In March I was getting my sewjo back with a vengeance and sewed my first self-drafted item for a while. I made a simple T-shirt based on an old RTW favourite and used some dramatic fabric to give it life. I’m going to use the same technique and extend that self-made pattern into a maxi dress.
I’ve seen a few IG posts using camouflage print jersey and I really liked them and I figured this should be a pretty easy conversion, I use the same technique from the pattern I made earlier this year but just need to lengthen to add a maxi skirt. The overlocker will be carrying the brunt of the work and this time I want to do a self-bound neckline rather than just turn over the edge as I did with the t-shirt.
Straights and curves
Preparation is as follows: you will need some paper to trace onto, you can do this with any paper, preferably wide enough to fit your garment and it should be slightly translucent so you can see your markings through it. I used A3 printer paper but you could also use parcel wrapping paper, tracing paper or another favourite of mine, wall lining paper (the stuff you put onto lumpy walls before the good paper to even it out). You’ll need pencils and markers, a ruler – I found that a standard 30cm is too short for most pieces and a metre stick is too long but I had a metal ruler that I used to use for picture framing which is 60cm and that is just right. You also need something to draw curves. You can use your ruler marking and moving as necessary or you can use a French curve or a flexible ruler/curve.
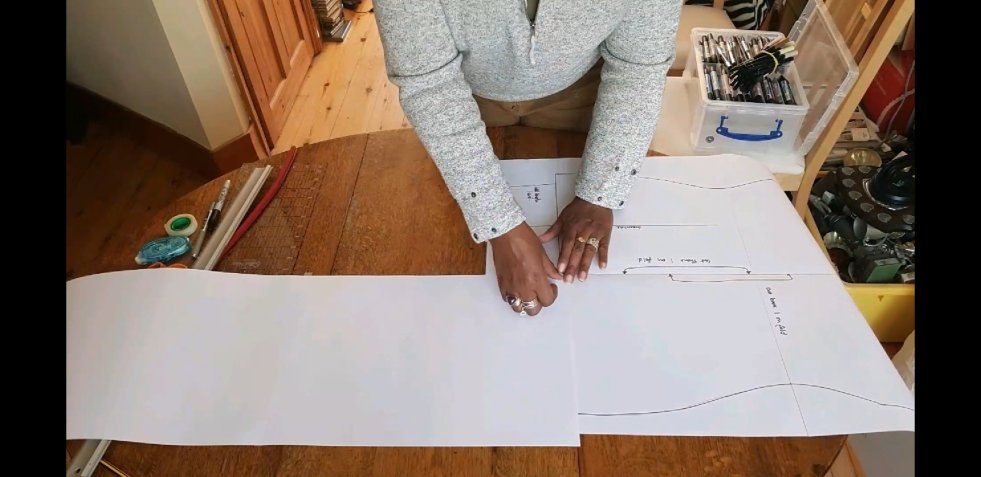
Two sheets of A3 taped together to allow for the top, place centre against the edge
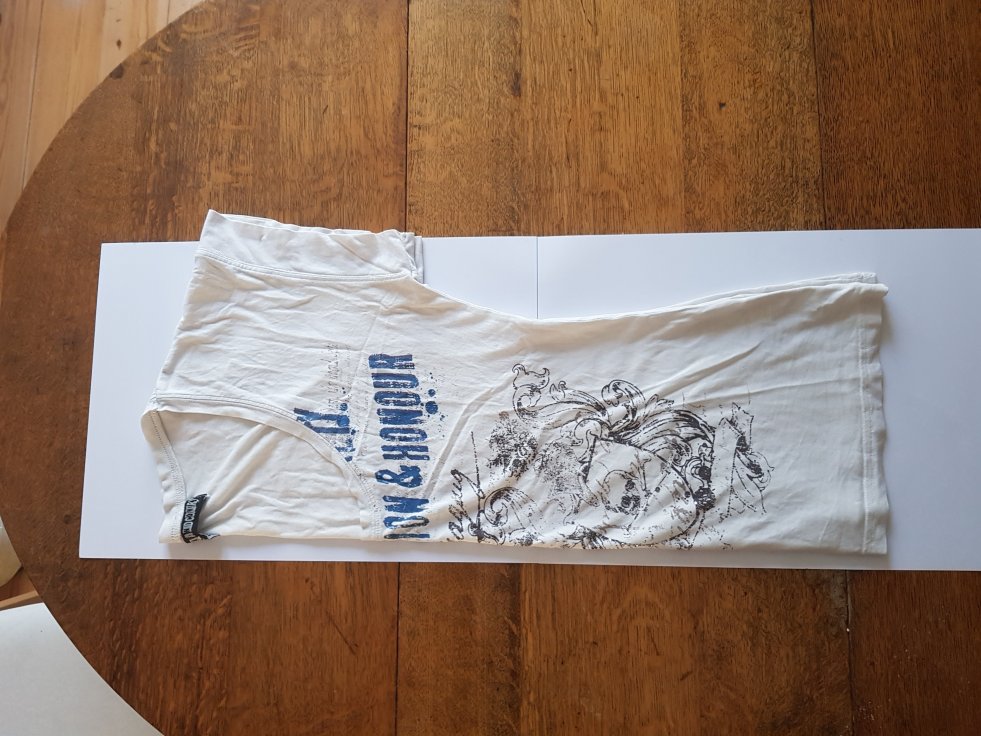
Start off by folding your t-shirt in half vertically – that is down the middle. Lay the t-shirt up against the edge of your paper. Simply trace around the t-shirt with a pencil and mark the neck, sleeves and hem. I used a pencil first as I didn’t want to mark my t-shirt. At the neck the outline will be the back neck, remember to put a mark where the frontneck is as you will need this later.
Remove the t-shirt and go over your markings with a Sharpie or some other dark marker. Use whichever method you choose to make a nice curve for both the front and the back neck. I also used the curve to give me a waist. You might want to draw in seam allowances here too, I allowed 1cm as I was going to use the overlocker to make it up but you can set your seam allowance to your own preferred width.
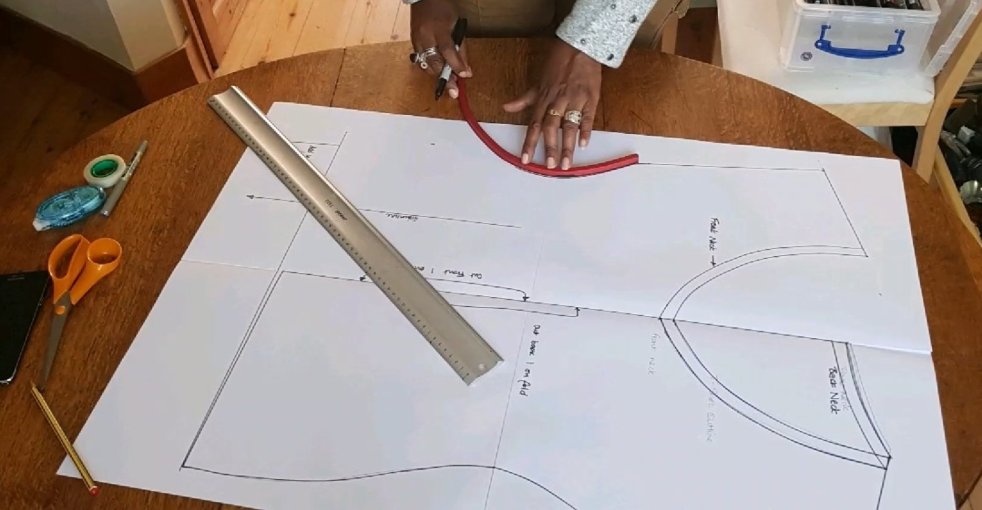
Once you have the outline take another piece of paper, stick it to the first piece at the centre front, fold the two pieces of paper at the join. You should be able to see your original line through the second sheet of paper, mark a mirror image of the first outline, this time marking in the front neckline only. When you have finished go over it in marker.
Pattern in two halves showing front neck and back neck
Now cut out the pattern pieces; on one side cut the back neck and on the other, you will cut the front neck.
My t-shirt cuts me at the hip so for the skirt, I measured from my hip to my ankle and cut a rectangle of paper, the width of the t-shirt, stick these pieces together and this makes the t-shirt into a maxi dress. The sleeves are simple cylinders which are grown onto the body. There are no armhole shapings to worry about. Cut out a rectangle the width of your armhole, allowing for seams. You choose how long to make your sleeves.
Last time a did a simple fold-over neckline but I decided to add a neckband to my tee. To do this measure around your neckline to determine the length of the binding you need adding a bit for the seam. Edit: this actually works better if you make the band a bit shorter than the neckline, I found later that my neckband gapes a little because it was too long. Cut a strip of fabric to this length and the desired width. I made my binding about a centimetre wide (when folded) but again it’s up to you how wide to make it.
Layout your fabric on the fold and cut your front and back. The cut out your sleeves and binding. I got this camo fabric way back in the spring from @fabric_styles just when this project came to mind.
Making up the dress with an overlocker is very easy. Join the shoulders first then attach the sleeves. Then join the sides from the sleeves to the hem matching the sleeves seams. Finish the sleeves by overlocking the edge and then folding over and topstitching the hem. You can also use a twin needle to finish this.
The little grown on sleeve with double topstitch finishing
The neckline was a first for me. Join the binding to form a hoop. Fold in half lengthwise wrong side to wrong side. Pin it to your neckline right side to right side and stitch or overlock. Turn in and press. On the outside topstitch in place. This gives a finish that looks so much more professional, I’m really pleased with how this came out and will finish all my tees like this now.
This slideshow requires JavaScript.
Et voila!
Finished maxi dress on Venus, you can also see my new floor in our refurbished hobbies room
Note to self, I found doing this skirt completely straight left me a little hobbled – no running for the bus in this dress! Next time I’ll add a bit of width at the bottom to make it slightly A-line and give myself a bit more room for manoeuvre.
This is a very simplistic method which can be done without any pattern drafting experience, you are simply tracing around an existing garment. Pick something that fits you and you love the look of and you can’t go too far wrong. Working with stretch fabric seems a little forgiving as well.
Here I am standing by a Sacramento wall
This dress has made its debut on my latest trip, I’ve been swanning around Sacramento in it and felt a million dollars. I would definitely recommend this jersey, it’s got a good stretch and holds its shape after washing. The camo looks surprisingly glamorous, or maybe its the fact that it’s a maxi dress, whichever, it got lots of compliments.
This clothes cloning feels a little addictive. I’m eyeing every t-shirt I own to see if they could become my next laineemake.


Your dress looks so comfortable!
LikeLike
Hi, yes it’s really comfortable to wear, almost a secret pyjama!
LikeLike