I live in a little house in a terraced street which probably used to be a “Two up two down” once upon a time. We added a room in the loft/attic whatever you want to call it about 20 years ago to accommodate our home-based work. Both being teachers we needed a space to do all that work we brought home.
It was intended to be an office/study/hobbies room where as well as our work we could do all of our hobbies such as painting, crafting and of course my sewing. We made the cardinal sin of moving into it before we had finished decorating and kitting it out and hence it spent 20 years ‘meaning to’ lay proper flooring. It also became full of all manner of junk as we always felt too busy and tired to organise it.

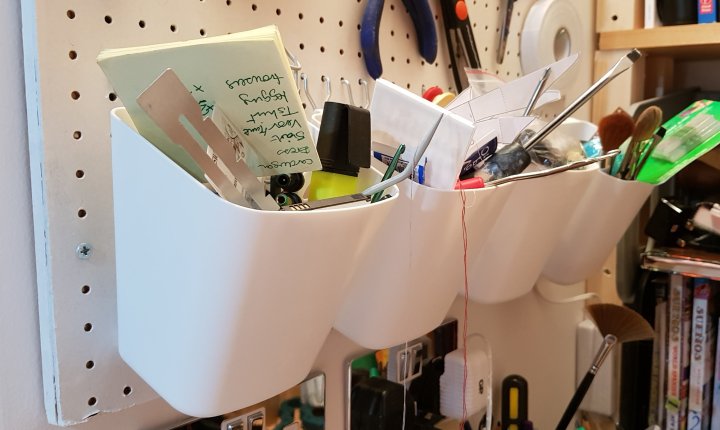
Now that we are no longer working we had time to put down the floor and it obviously was the perfect time to rethink the decoration and use of the room. When we started we had only just got our first computer since then we have a computer and laptop each; printer, scanner and other gadgets and that’s before we even get to my sewing gear. On the other side of this room, I have my desk with computer and its also where my pegboard lives. This area also needs reorganising and sprucing up.
August: We started plotting and scheming to get this room sorted. This room is multipurpose and the challenge is to ensure this is a good creative space while maximising storage. Here’s the rough plan of what we were about to do. Planning was as far as we got before our summer camping trip.


September: Back from France, once we had stored the enormous amount of stuff that came out of our room, the first thing we did was get an electrician in to install more power outlets, we never seem to have enough. I had a geek out and got some beautiful shiny sockets that also have integral USB charger ports – I had a pair put at desk level so I can charge ALL my gadgets easily while I work.

Once we had enough sockets (I hope) we then painted the room and ceiling a neutral white with a great feature wall in a brilliant green. This may or may not serve as a backdrop for my future makes pics if I ever learn how to pose decently to show off my stuff.

Now for the flooring. We decided we wanted a wooden floor for ease of cleaning up all those fabric and thread scraps and to avoid mucky carpets and trip-hazard rugs. However as this space is above our bedrooms and I’m partial to a bit (OK a lot) of late-night sewing, we opted in the end for a wood effect vinyl to reduce the noise.
The vinyl was remarkably easy to lay once we had actually got it up the stairs and manoeuvred it into the loft. A feat which involved dangling it out of the landing window and then bringing it in at a very tight angle.

Floor laid and now we had to sort out the storage. Gary was going to build some more suitable storage, repurposing the display shelf he built 20 years ago. We had some rough plans for that but, guess what? It was time to go off to California for a month. I managed to throw together a couple of makes for my hols; my camo maxi dress and the twist front top with bell sleeves and also a test garment I was working on but then it was time to leave my sewing and the decorating for what felt like a long time. Oh well!
November: OK now we are back and time to get stuck in as I have stuff I want to make. Gary has a woodworking thing going on to match my dressmaking; I dream of us making and upholstering furniture together one day, but for now, we are creating our making space.
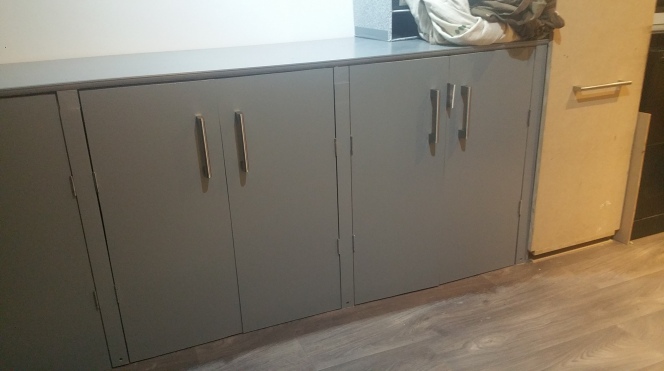
The original configuration had a wall unit where we kept storage boxes full of various stuff. Initially, the plan was to create cupboards and then reuse the shelves above but once the lower storage was made I actually felt I liked having the extra work surface and also a bit of clear wall. I’d like some pictures there eventually. So the revised plan is for a set of cupboards made from MDF and whatever leftovers we have in the house. The cupboards are deeper than the shelves they are replacing. Plenty of room hopefully not only for my sewing stash but my art stash as well. Further along, there is going to be a floor-to-ceiling pull-out system for Gary’s stuff. There will also still be his desk space and more work surface for me.

Gary’s end of the room is more or less unchanged, we are losing one filing cabinet and the contents of this will go into the upright cupboard. The other side of the tall cupboard is where he will build the new cupboards.
When we originally converted the attic into this room we sacrificed most of the storage in the house. Our hobbies (OK – mostly my hobbies and hoarding tendencies) have generated a fair bit of stuff. It’s not just the fabric folks, there are stashes of artists’ gear, stashes of craft materials, books, photographic and technological paraphernalia of all sorts coming out of my ears. While I’m trying to declutter as things come back from storage we need capacity for what we want to keep; there must be enough room for each of us to work and keep all of our bits and bobs. I’m trying to adopt a ‘place for everything’ strategy as I’m very bad at putting things away so I want to remove the excuse ‘I don’t know where this goes’. By building these cupboards the OH has created a bit more storage which is out of sight and also created an additional workspace.
The #hemade storage came out fabulously I’ve got somewhere to put all my fabric stash as well as the art materials. We did end up putting one column of shelves up but I’ve also now got a huge total work surface when combined with my cutting table.
January: I’m really delighted with the overall outcome and can’t get over how spacious the room looks now.

I’m debating whether my machines will stay out on display rather than in the cubby-hole in the sewing table, I kind of like this idea as I can just walk over and start using them rather than have to get them out from under the table. I’ve also been toying with standing up to sew as I keep reading about how prolonged sitting is not good for you. I might look at some kind of platform to raise the machines.

In addition, this is my desk area where my pegboard lives. Plus my slimmed down library which is now mostly sewing and Spanish textbooks. I have an amazing new creative space.

I could go on and on about my new space as it’s so much improved and there are so many good things here, I keep turning around and looking at it all with a big grin on my face. It’s also so pretty that I hope it makes me more likely to keep it nice I’m trying to make sure I put stuff away before I leave. (Oh who am I kidding?)

I’d love to nosy at other people’s sewing spaces, so I’m off to stalk some in the blogs and vlogs. What are the essentials that you couldn’t do without and the things that enhance your crafting the most?
Happy sewing space.
Elaine x

It seems a good job!
My sewing space is a disaster… 😀
LikeLiked by 1 person
[…] Day 5: Sewing corner – I got a refurbished sewing space this year and I’m delighted with it. It’s an absolute bloody mess at the moment, but here it is in a finer moment. There’s more about this here […]
LikeLike