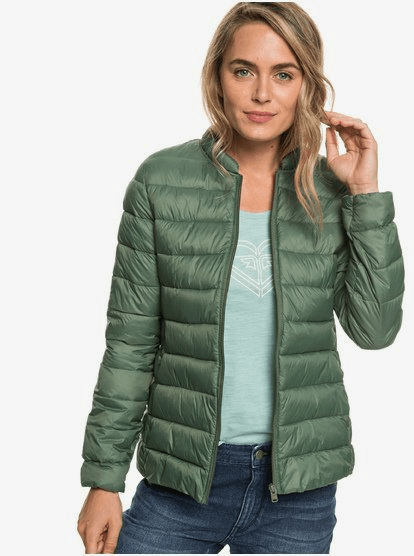
Often on my semi-regular walks on the Downs, I have admired my friend’s lightweight down jacket that she wears when the weather has just a little nip in the air but it’s not cold enough for a big jacket.
I continued to covet my friend’s jacket and also considered the ££££ demanded by outdoor apparel brands. Inevitably, I came to the conclusion that I should make my own. Looking at it, I thought that it can’t be that hard, a simple bodice and standard sleeves and a hood, so it went into the memory banks and finally onto my list of Planned Makes.
There are always other projects, of course, but I’ve recently heard that one of my favourite sewing challenge teams is back. The #sewtogetherforsummer challenge has evolved into #sewtogetherforwinter and to my delight, the challenge is to make coats. I love making coats.
While deciding what would be my entry I remembered this jacket idea. This is the sort of thing I was thinking of.


Then I remembered this sleeping bag that we’d been storing in the cupboard for quite a few years. We’ve had some great camping holidays in Europe in the last decade and eventually we tried camping in the UK a couple of times. Despite our epic tent, we found it too cold in spring and autumn and therefore I invested in this big double sleeping bag which claimed to be suitable for those seasons. It still wasn’t warm enough so that idea was abandoned and we chose to stick to the Mediterranean or thereabouts for camping.
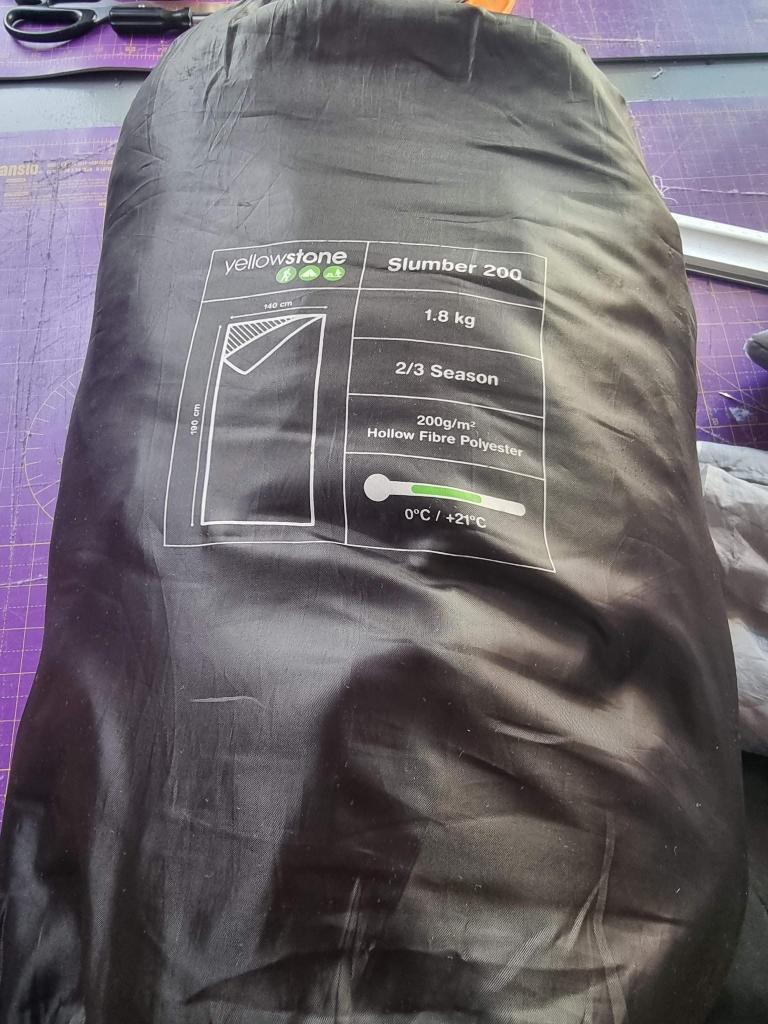

That was a few years ago now and we have since decided that we probably won’t do tent camping anymore, anywhere! Therefore, we no longer need this sleeping bag and it has resided in the airing cupboard waiting for me to decide what to do with it. This project prompted me to finally turn my hand to upcycling. I would use this sleeping bag to make my padded jacket.
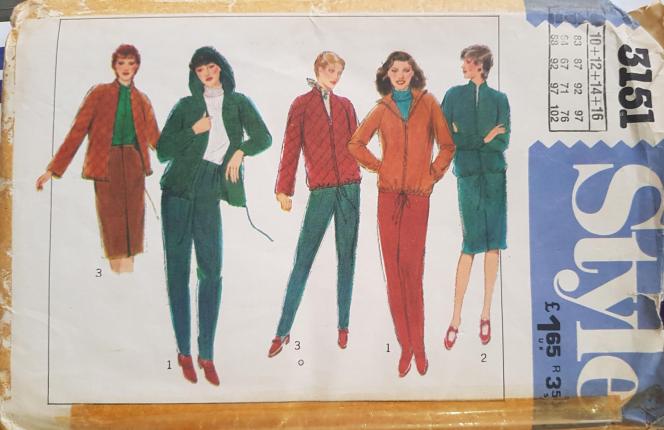
It was time to break out another one of my long-forgotten pattern treasures. I knew I had a pattern for an anorak and here it is – the artwork looks like it’s from the 1970s or 80s. It’s another cut pattern that I don’t remember using. I might have inherited it from somebody. Anyway, Style Patterns 3151 is going to become my wadded jacket. Such classic shapes – the skirt and trousers look like good basics too. I’m going for a hooded version without the drawstring – there is even a quilted view.

So what am I working with? The carrying bag tells me that I have 190 cm by 280cm of material to play with, so I’ve got quite a lot of fabric. I decided to cut my torso pieces with the bottom edge aligned on what would have been the opening of the sleeping bag. The edge is already finished so I figured I’d take advantage of that and reduce some of my work.
As usual, I cut out the pieces with my rotary blade but there are three layers, the two outside ones plus the wadding – with hindsight, I wish that as well as using weights, I had pinned or basted around the edge of the pattern pieces before I cut because there was definitely some shifting going on and I noticed later that I have lost a cm or so on one of my hood pieces.
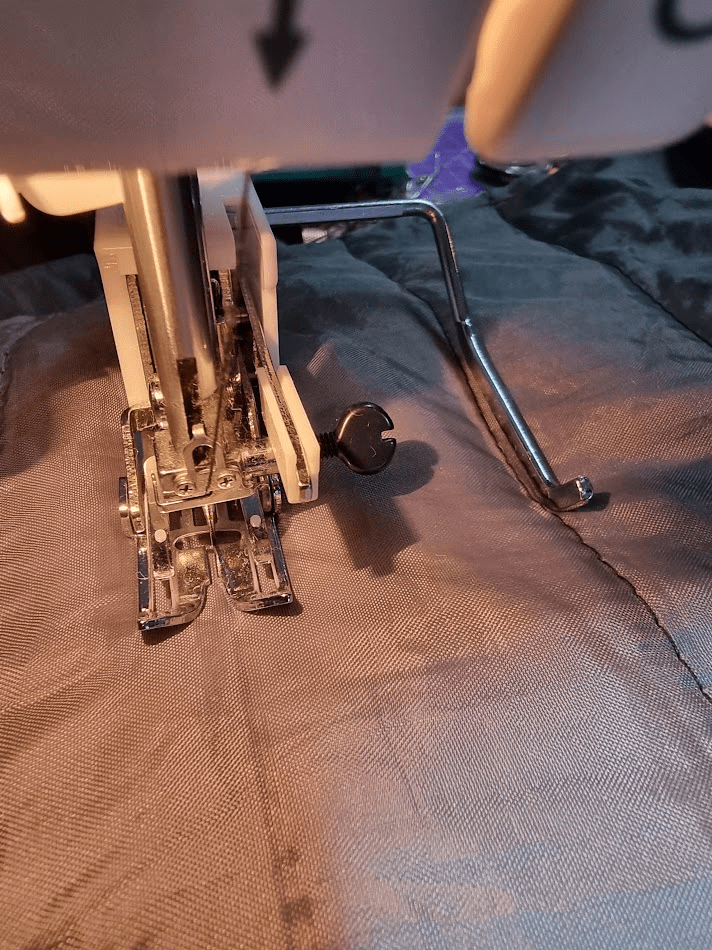
There is some basic quilting already on the sleeping bag but it’s quite limited. I decided I wanted some more, not just for decorative purposes, but I think it will help to hold the wadding in place. I started browsing for fancy quilting patterns but in the end, I decided horizontal lines would suffice. I machine-basted around the edge of all the pieces to secure them while quilting. Fortunately, I remembered I had a walking foot with which to do the quilting and it makes such a difference, keeping the pieces all together and stopping them from sliding about.
Here’s my first batch of quilting on the hood. Side note: It may be because no one can see their own head but I can’t get over how huge a hood is in flat form.

Note to anyone: quilting- and I don’t want to insult real quilters here because you can barely call it quilting – is not easy and it’s time-consuming. (Tierney, if you’re reading this, my admiration for you soared even higher). Also, keep an eye on your bobbin thread. There was a (thankfully) short session of phantom sewing because I wasn’t aware that it ran out on me.
Something else that I’ve realised is that sewing a quilted garment is like making it twice because you have to “make” your fabric before you can start assembling your garment. Using the walking foot made it a manageable task. I actually started to enjoy the repetitive nature of driving those lines across the fabric. It’s very mindful.
Near the end of this stage though, my mind started to churn over how I was actually going to sew these pieces together. I needed to think of some way of finishing the seams so that they would look decent on the inside. The pattern instructions talked about using a flat felled seam to finish the garment but their instructions didn’t sound quite like a flat felled seam to me but more like an imitation of one. They recommend sewing the seams with the right sides together as normal and then pressing the seam to one side and then top stitching so I tried that.

The construction of this jacket really is straightforward and definitely a beginner-friendly project and if you had pre-quilted material it would be so easy. Once the quilting was done I flew through the construction of basically six seams in the body, one each for the sleeves and then you have the hood. A little bit of care is required to insert the pockets neatly. I used only the outer material to avoid bulk but I wonder if I should have fished out a piece of fleece from somewhere.
The hardest bit is just keeping all of the quilting under the presser foot of the overlocker so that you don’t get any escapees. In fact, the only reason that I didn’t finish this within the day was that I was waiting on a zip that I’d ordered a couple of days earlier. It had to be installed before could put the hood on and finish so I had to put this aside for a couple of days while I waited for this bit of haberdashery
Incidentally, I recently discovered that our longtime brick-and-mortar haberdashery shop, C&H fabrics, or Closs and Hamblin will be closing after more than 40 years in our city centre. It’s a family business and the second generation has decided to call it a day. I have some very sad and sentimental feelings about that. I’ve been using C&H Fabrics for 30-plus years since I moved here, at times spending far too much money and I’ll be really sad to see them go. It’s a place you go when you need a thing, sometimes you don’t even know what it’s called but they usually have what you need. It’s also a place where I’ve spent hours feeling fabric and poring over pattern books and sharing knowledge with the staff, all of whom were also makers. There’s a poignancy about it as I feel partially responsible since I’ve switched much of my shopping online. As we know bricks and mortar establishments just can’t compete with the price and range of products that online retailers can offer. It’s a conundrum – on a limited income I have to look for affordable supplies but our city and shopping centre will be worse off without this shop. I went in there for some bias binding and spent some time chatting with the ladies, many of whom I recognise as having worked there for decades. I’ll keep my eye open for the closing down sale, but it will be a bitter-sweet bargain hunt.

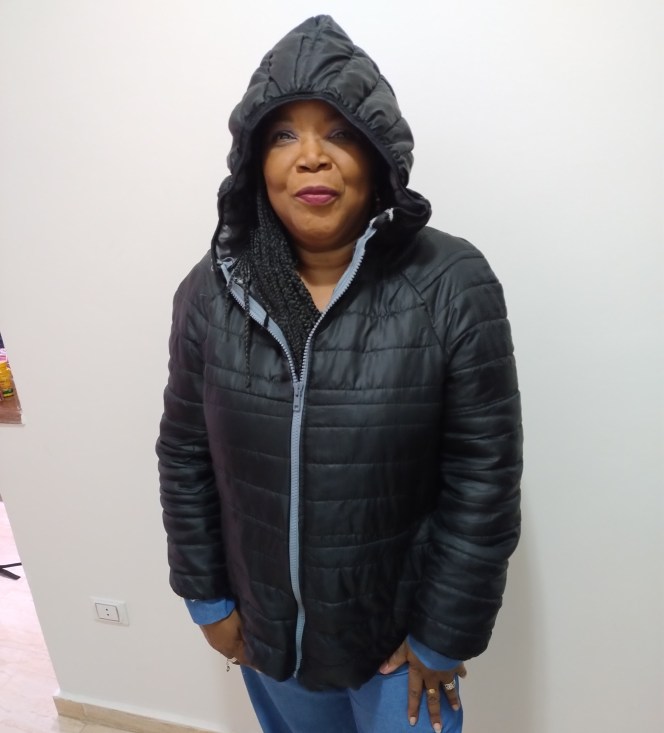
Anyway, back to this project. I saw a finishing idea on one of the inspiration photos above. Rather than a drawstring, it appears to have elastic around the hood opening. I quite like the look of that and set about trying to recreate it. First tried some bias binding which was said to have stretch but I think I needed actual elastic. I had some fold-over elastic in the stash so I used that. It’s not as wide as I would have liked but it may be the solution I need. As I feared, it was a bit too narrow. I eventually found some (online of course) which was a bit wider (2cm) and that seems to be a match, ideally, I’d want it even thicker but I don’t know if such a thing exists.

Once I’d finished the hood I could install the zip and finish the jacket. I want to finish the seams on the inside to make it #justasniceontheinside but I can’t yet find the right method. I’m not intending this to be waterproof so I’m not looking for seam tape but something like twill tape will just make it all neater.
Update: after being caught in a shower the first time I wore the jacket, I decided to try to waterproof it. I sprayed it with some Nikwax waterproofing treatment that I had for my tents. I’ll report back at some point on its effectiveness.

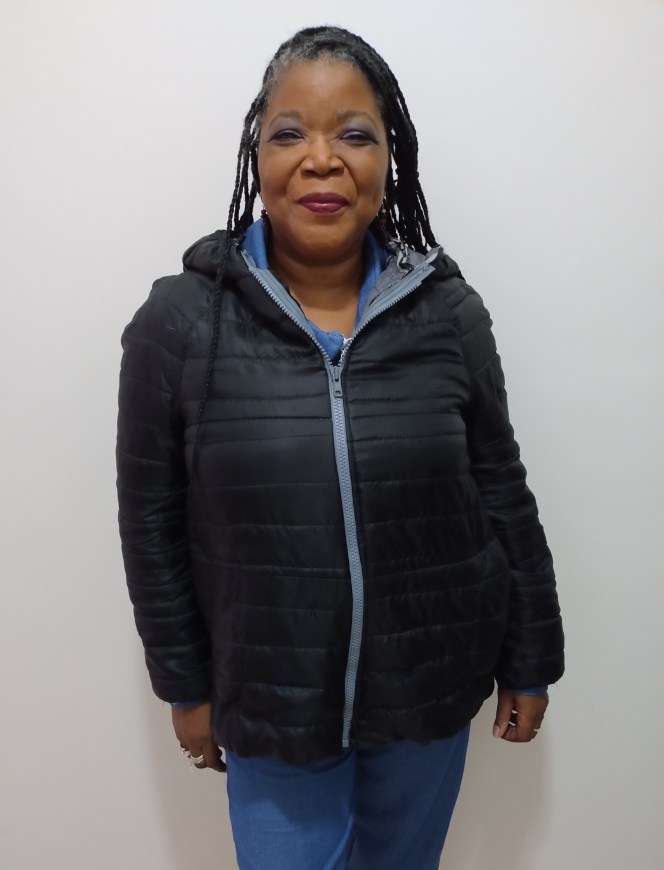
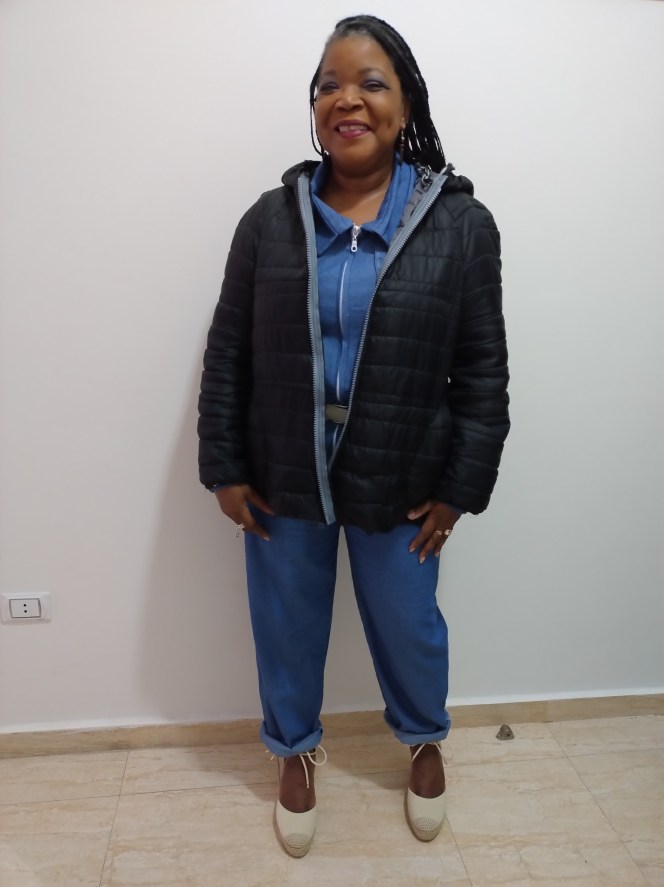
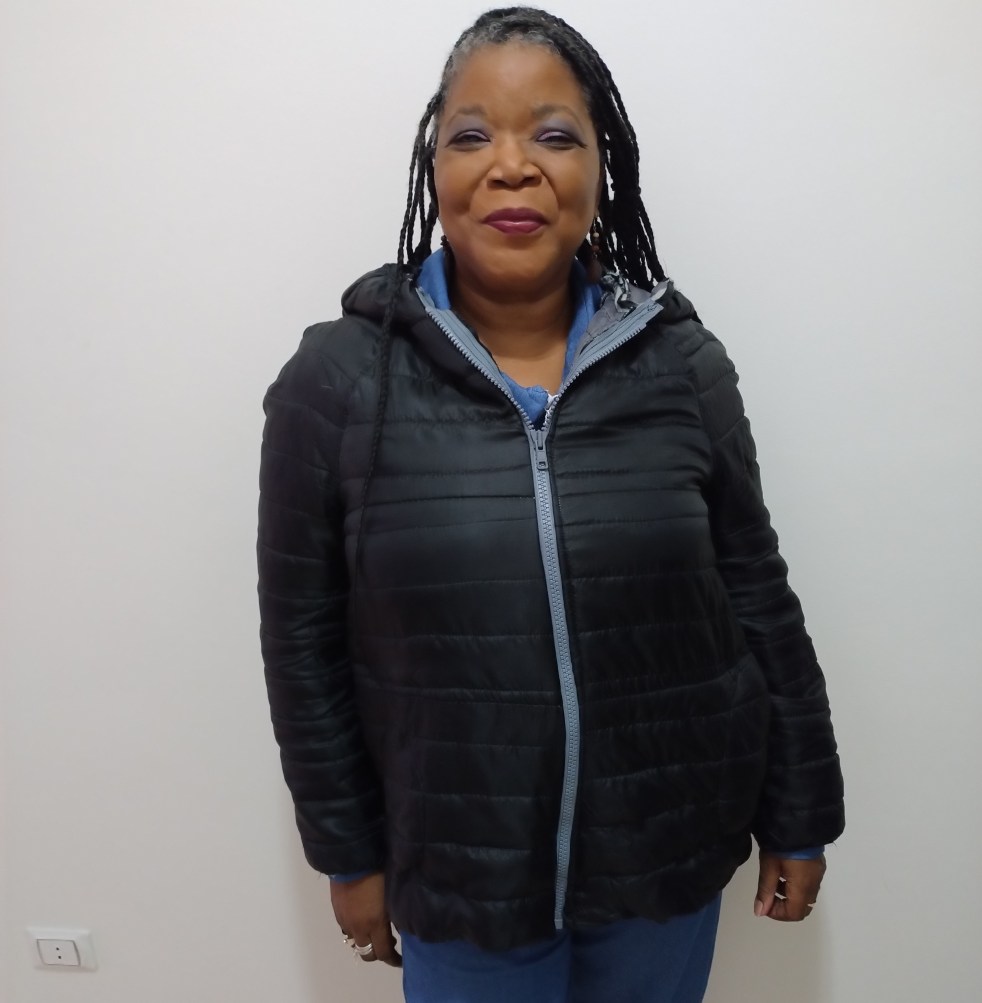
So my first intentional upcycle is complete and I’m pretty happy. I had to improvise here and there but the jacket is warm (in this autumn weather), light and compact so I can fold it up and carry it in my rucksack when walking. It will also make a good light jacket to take on trips when I might need something for cool evenings. I’ve still got quite a sizeable chunk of my sleeping bag left so I have to see what else I can make with it.
Is upcycling something you have tried, what was your project and how did it go?
Thanks for dropping by,


Cool idea to use a sleeping bag! Looks great.
LikeLiked by 1 person
Thank you, it was a really fun project.
LikeLike
Great use of a sleeping bag
LikeLiked by 1 person
Thanks, I’ve got a lot more left over that I want to use for something.
LikeLike
Wow – seriously creative recycling!!!
LikeLiked by 1 person
I’m keen to try some more
LikeLiked by 1 person
This is so impressive! I’m following to see what you do with the rest of the sleeping bag. Have you done other textile up-cycling projects?
LikeLiked by 1 person
Hi, welcome! This was my first official upcycle, I haven’t done any others yet. As for the remains of the sleeping bag, I’m still thinking about what it should become.
LikeLiked by 1 person