
After I’d been eyeing the Designin’ December sewing challenge hosted by Linda @nicedressthanksimadeit for quite a while, I finally got around to entering last year with my Chiffon Jeans Jacket made during my end of year frosting fest. This is a contender for this year’s challenge.
There are so many things I see online that I go all gooey over and would love to make, but the last few years I keep coming back to the Teddy Bear Icon Coat by Max Mara.

There’s something about this coat that I just love and even though, firstly, I made a coat last year and secondly, it just doesn’t get cold enough to need a woolly coat very often, down here, I wanted to make this cosy, snuggly, made for the depths of winter coat because I just adore it.

I scoured my stash and the internet looking for just the right pattern. I’ve got a few coat patterns and I’ve made a nice woollen coat before but the teddy coat is quite an oversized shape with dropped set-in sleeves and I couldn’t quite find the pattern that I wanted. I went round and round looking for the right pattern between a few Vogue ones I had. Then, while I was looking through my ancient Burda collection for something else, I stumbled across the perfect slouchy drop shoulder pattern which would help me make this coat. Say hello to Burda magazine 10/97 Model 114.
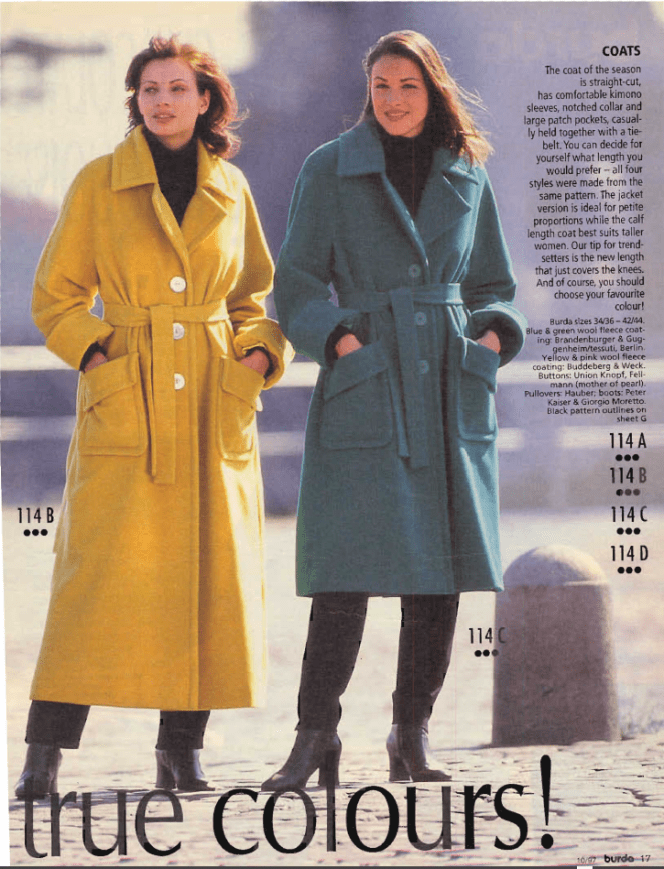
To be fair it’s a bit of a compromise, the teddy coat is double-breasted and this Burda one as you can see is just a single-breasted front but again, short of having access to Max Mara’s design team, I think this will have to do. A few changes will need to be made, for example, I will cut a belt if the fabric is sufficient but for the purposes of the final reveal, I will omit it. I’ll also leave out the cuffs. I’ll be making welt pockets to match the inspiration rather than the patch pockets shown here. This increases the required skill level but as I said this ain’t my first time at the coat making party. The slouchy Max Mara coat looks almost full length but it does come in a range of lengths so I’m going for the midi one.

Then came the dilemma of what colour should my coat be, the first time I saw this coat was in camel wool. Camel is having yet another moment this year, but I have a camel coat, plus I’ve sewn a ton of camel stuff last autumn and decided to go for something a little bit different and then I saw this version in a (totally impractical) pale off-white. Drool.


Move on to the next step. After the long quest of finding a suitable pattern, I progressed to the equally frustrating task of finding the right fabric. With the original coat ringing the till at £1920, I didn’t think I’d be able to stretch to the alpaca-silk-cashmere levels of luxury in the fabric department. It was just as well I made that decision because I don’t know where the hell I would have found such a mythical creature – I have been up and down and round about the internet I just couldn’t find teddy wool coating fabric/ alpaca silk cashmere mix coating or to my eye a close substitute. It might have just been my interwebz searching skills but I just couldn’t find the perfect fabric. After a couple of years of looking intermittently, I found this plush cotton cuddle teddy bear fleece from Active Fabrics. It’s the closest that I could get although I’m not entirely happy because I wanted it with a deeper pile, but, needs must – this is as close a match as I could find. I bought 3 metres of this and crossed my fingers.
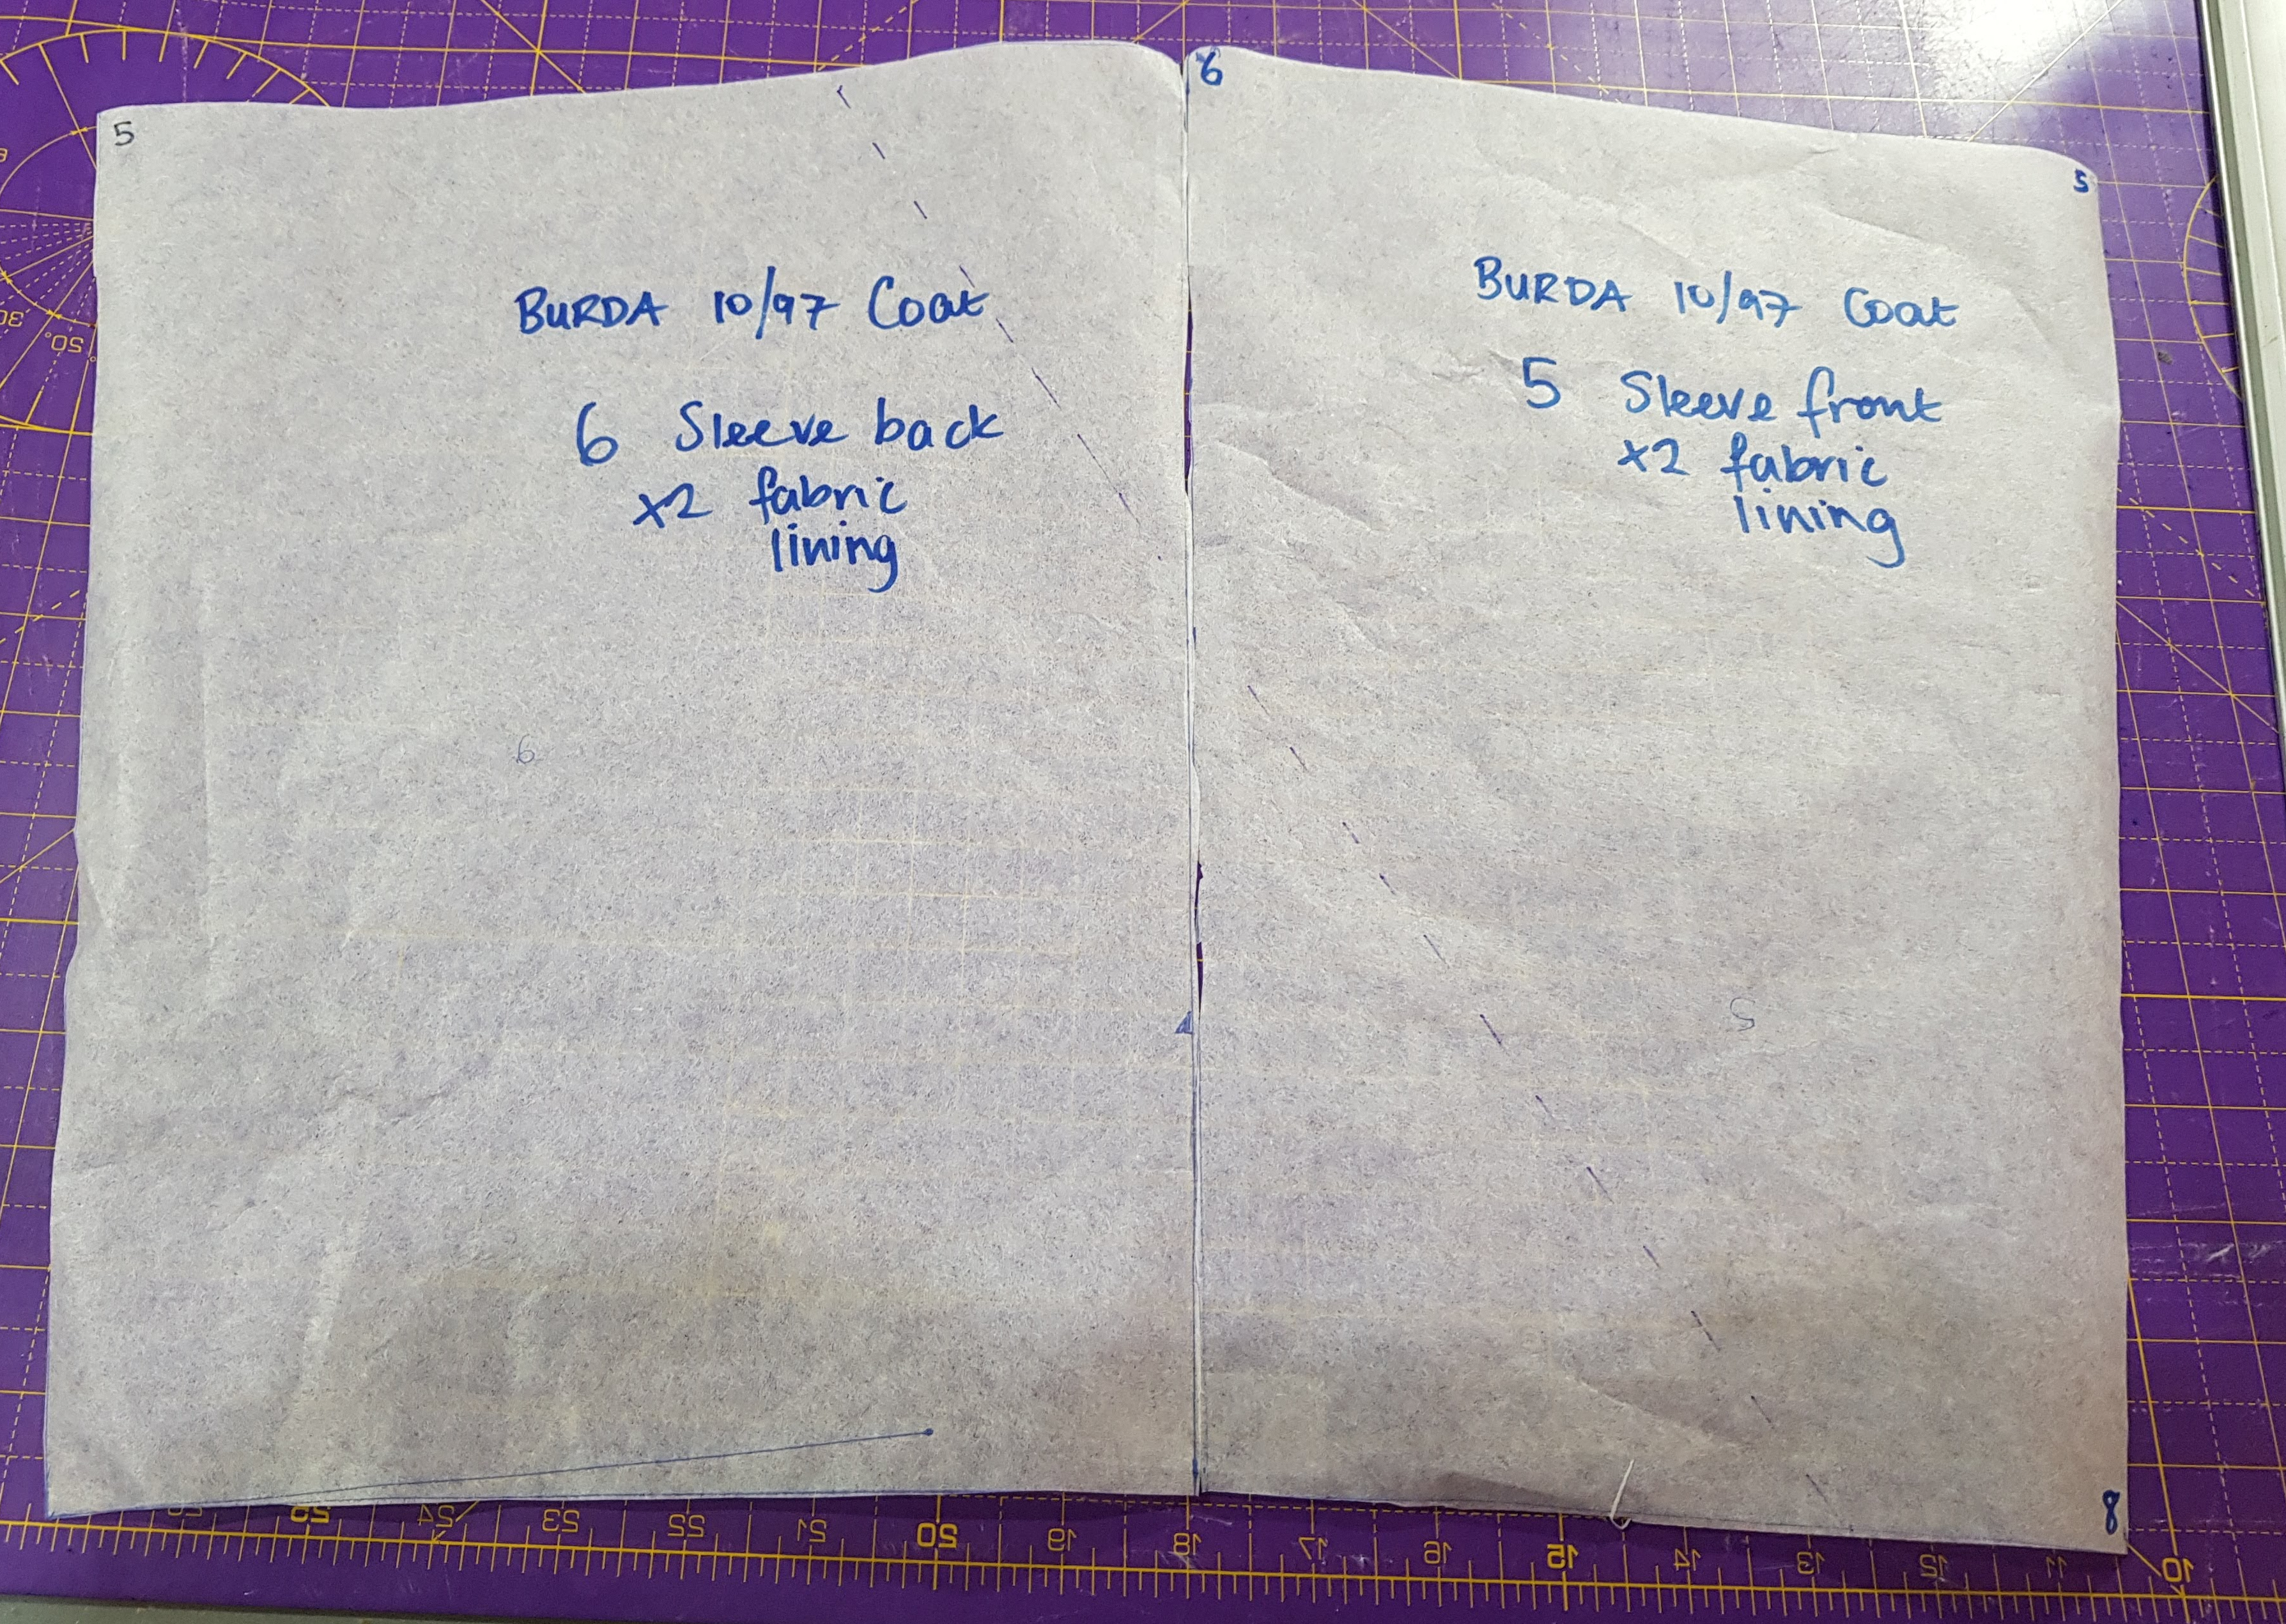
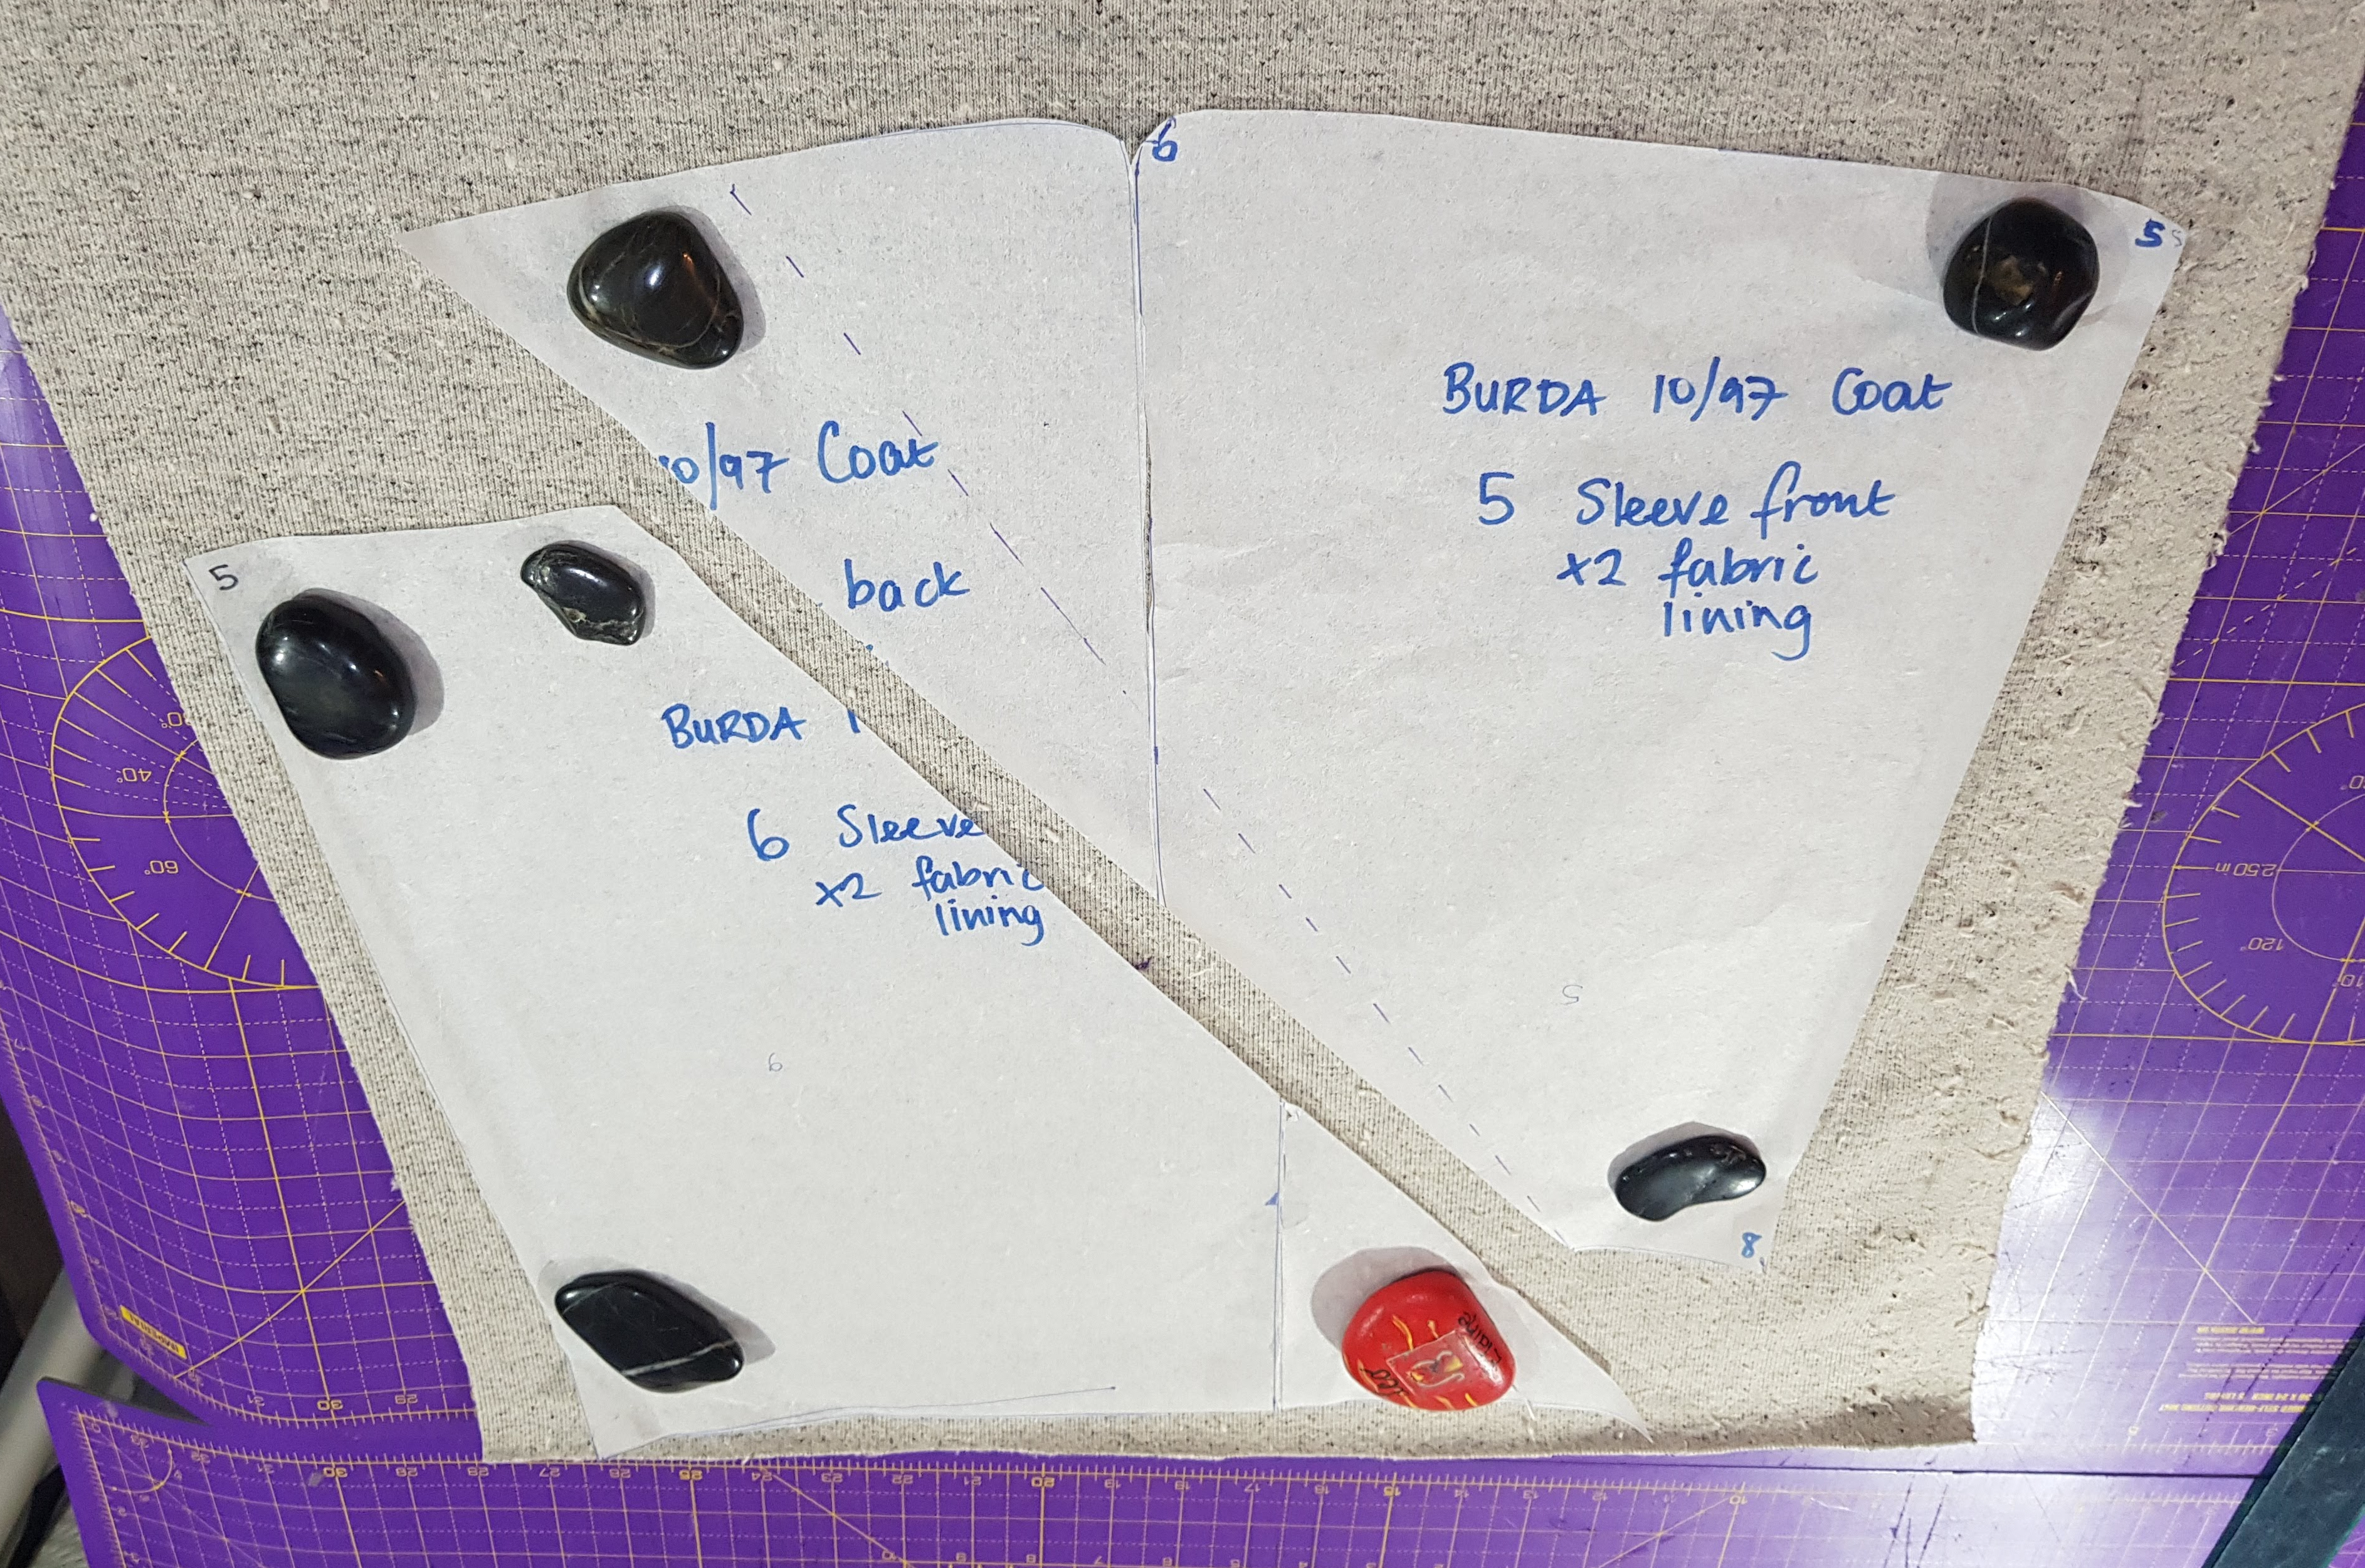
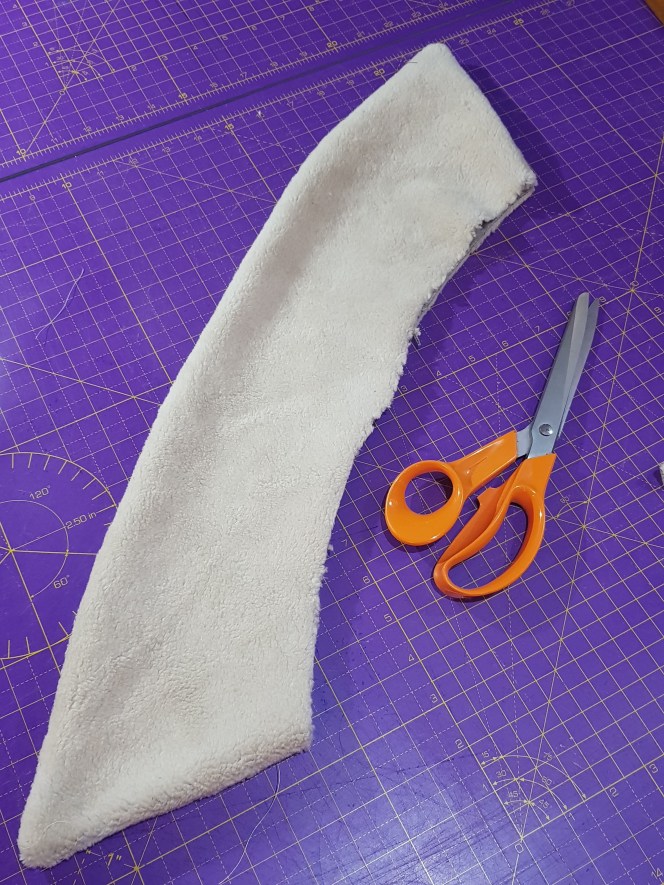
The first step in making it up was creating the sleeves, the teddy bear coat has an interesting looking two-piece (I think) sleeve with a seam moving around it diagonally. Not having been privy to the actual coat in my hands, I’m improvising to make my spiral stripe.
The Burda sleeve is in two pieces. I stuck the front and back sleeve pieces together and made a diagonal slash through it. I then made two strips, 3 cm in width to make the insert. The key point here is to remember to take the 3 centimetres out of the seams so that your sleeves fit into the opening when you install them. I don’t think they look too bad and hopefully, they’ll give me the effect I want when I’ve assembled the sleeves in the body.

Then I moved on to what I try to do on most projects, after reading the instructions to see if there are any tricky bits, which is to sew together all the long seams and it always gives me pleasure at how soon my garment starts to take shape.
Then pick up the instructions which start off with joining the two back pieces leaving an opening for the vent. It was at this point I realised that the Max Mara coat does not have a vent. Oh well, I am, as they say, in too deep now with no surplus fabric to recut anything. Next join the sides, effectively working from the bottom up here joining the sides and then inserting an underarm gusset before adding the sleeves.
The idiosyncrasies of Burda magazine’s pattern instructions are legendary, and I found when trying to install the underarm gusset that this is one of the points where, if you’re unfamiliar with garment construction, you might need a bit of hand-holding and yet this is the place where there are the fewest instructions. It does refer to a diagram that shows numbered join points and I get it and it’s useful to a certain extent, but I think you would have to be an intermediate to advanced level sewist to be really confident with this. Anyway, the gusset is pinned into position so that the top edge is in line with where the sleeve will be attached; the corners of the gusset fit into the large underarm notches of the front and back pieces while the top of the gusset should be in line with the seam which will be attached to the sleeve. It is difficult to describe which is probably why Burda didn’t bother.


Now because I created a feature sleeve, the installation was different from the pattern. the Burda coat has you attach the sleeves to the body then join the back and front whereas I closed the shoulder first and I’m going to close the sleeve, then with the right sides together set it into the armhole of the coat.
The sleeves are in place and so is my cheesy grin. It looks like a coat, it looks like a very nice coat and even though my lining and body are still separate entities I just know that this is going to work out just fine. Time to add the facing.
Attaching the collar was the next step and this also marries the outer and lining together, as one piece joins to the coat and the other to the lining. The large notched collar is the most prominent feature, I always feel collars and necklines are where the eye naturally falls and therefore needs to be executed well.

After trying it on for the first time, I realised I’d have to change the shape. The Max Mara coat is slightly cocoon-shaped while the Burda pattern is an A shape so I’ll have to do a bit of sculpting to change this.
The pattern has patch pockets but I decided to make welt pockets like the inspiration garment. Welt pockets are a top skill and a badly inserted one can kill your project, so steady does it.


On to the final and crucial finishing of hems and closing the lining. The quilted lining – also from Active Fabrics – sewed up really easily and I was just delighted how it complimented the fleecy outer layer. I joined them using the bagging out technique – match those notches! I don’t know why but I really enjoy bagging out coats and jackets. I added a hanging loop and got a new supply of labels for this coat and seeing them on my garments always makes me smile.

When I finished my welt pockets I remembered that I always lament the absence of internal pockets on women’s coats and decided to add some. I had some surplus quilted fabric so I fashioned a couple of patch pockets for the inside of the coat which will be good for carrying little necessities such as lipstick and sweeties and eliminate the need for a handbag – wait what am I talking about, I love handbags.

I’ve worn my coat out in the world and I love it. There are a few things I’d change. The neckline is very “open” and I hadn’t realised this at first. If making this again I’d have to try to convert that front to be double-breasted to get that Hug that I’m after. TBH I wish I’d made it a tad more oversized to get the true look of the original but while not identical, I think my teddy bear coat satisfies my craving for this designer icon. What do you think, should this be my Designin’ December entry?
Thanks for dropping by.


Oh this looks sooo warm! I love it! ❤️ Thank you for joining in!
LikeLiked by 1 person
Thanks, Linda, it’s so lovely and warm I’m really happy with it!
LikeLiked by 1 person
Looks wonderful and I think a bit more oversized would be cool also!
LikeLike
Thanks Tierney, I definitely think it needs to be more snuggly.
LikeLiked by 1 person