
This top was made for a Minerva Brand Ambassador feature. Minerva was showcasing New Look Patterns and asked us to choose a pattern to review. I chose this simple but sophisticated-looking top. I had just acquired some light blue silk from an IG destash and it looks just like the top on the model – I thought it would be perfect for this top. As it was silk, I – wait for it – made a toile!!!!!!!!!

I decided to use fabric from my stash. I sewed it in a lightweight burgundy poly crepe. This deep red would show off the pleats and the gathering at the waist. If you are using a silky fabric be careful when cutting as it’ll shift on you. Ask me how I know! Although this fabric was a little bit slinky, it has the bonus of not fraying so it was easy to finish the raw edges. I’d also recommend finishing the hems with a rolled hem or very narrow hem, particularly on the sleeves as the inside will show.
I started by sewing the seams of the bodice and raglan sleeves together, using the notches to make sure I had the front and back matched correctly. At this point, I hemmed all of the pieces with a narrow hem by folding over and pressing at half a centimetre and then stitching that near the fold. as the fabric does not fray, this finish was sufficient.
As the fabric was wriggly, in order to make sure it was straight, I drew a line on the fabric between the 2 notches just to keep me in line.
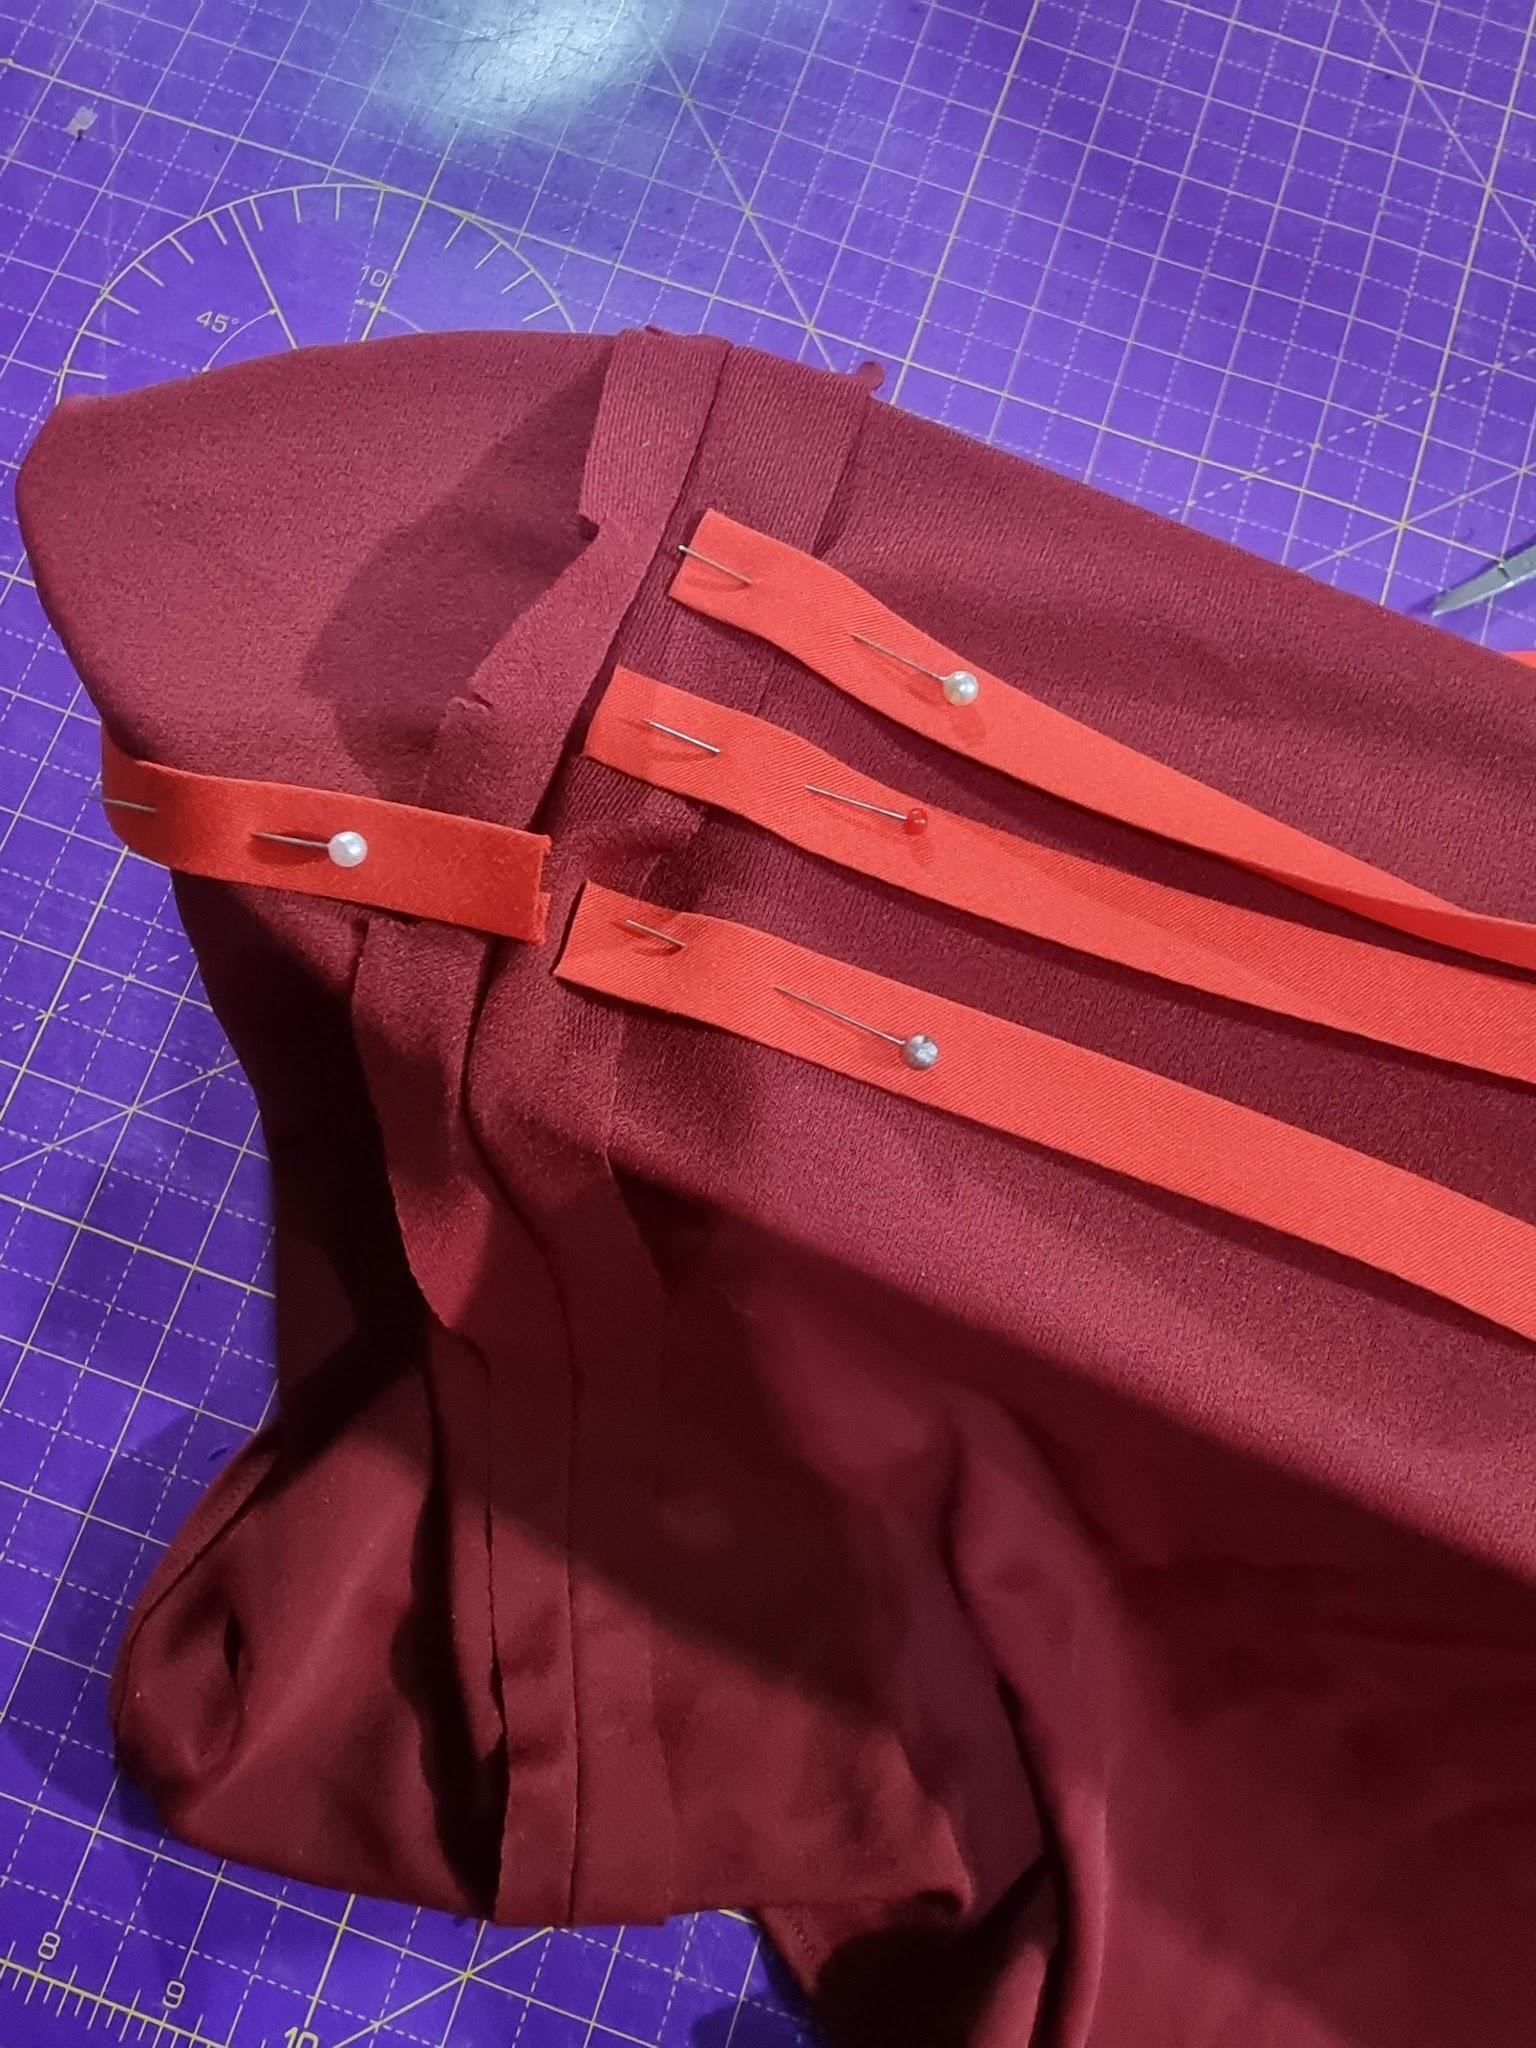
The most involved part of the construction and I think, the key feature of the design, is the gathering at the waist. Three parallel rows of bias tape form channels to run elastic through. Take care to pin and even baste if necessary, you’d be surprised how hard this tries to wriggle and resists lying in a straight line. I’d recommend getting wider bias tape than is recommended as I found it difficult to get the elastic to pass through the channel.
Once I had the first piece of bias tape pinned In position. I lined up the other two parallel to it and sewed the sides of the bias tape down very close to the edges. Then feed the elastic through using a safety pin or turning tool.
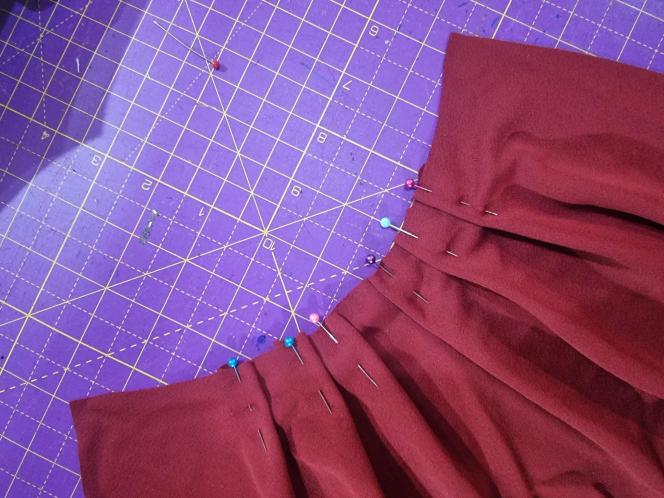
Sleeves could then be inserted and the bias strip cut for the neckline was attached. Pin it carefully in place making sure to pin the pleats into position to prevent them from moving while stitching. I sewed the bias strip onto the neckline on the right side then folded over the binding and pinned it in place on the other side before slip stitching it to the body. I actually finished the neckline by hand, something I’ve started doing more of recently. It’s very satisfying.
And that was it, a relatively easy sew just requiring a little patience for the elastic insertion and a little hand sewing.


I love the colour and the shape of the top and I’m lining up the blue silk for another version.
Thanks for dropping by,


I love the full length photo of you in this, you look so happy! Good luck with the blue version.
LikeLike
Thank you, this hobby really does make me happy, I always have fun in my spare room photoshoots 🙂
LikeLiked by 1 person
You are a natural model! I wish I could do that 🙂
LikeLiked by 1 person
Ah thanks, but look who’s talking. You always look like the perfect model in your makes.
LikeLiked by 1 person
Aww thanks! My husband is very good at taking nice pictures
LikeLike
I like your top better than the one on the pattern package! What a great color and style on you!
LikeLike
Thank you, I’m really into reds at the moment. It will be interesting to see whether I end up preferring this to the blue silk.
LikeLiked by 1 person
Lovely top! And perfect for the pants. Thanks for the bits of advice regarding wriggling fabric. I often struggle with that.
LikeLike
Thanks, I’m glad to share tips, we’re always learning in this hobby.
LikeLike