I’ve been drooling over the artwork of Yuki at Waffle Patterns for a long time and day-dreamed over her drawings wishing not only could I think up such great designs but also that I could illustrate them so well. Just call me a #fangirl.
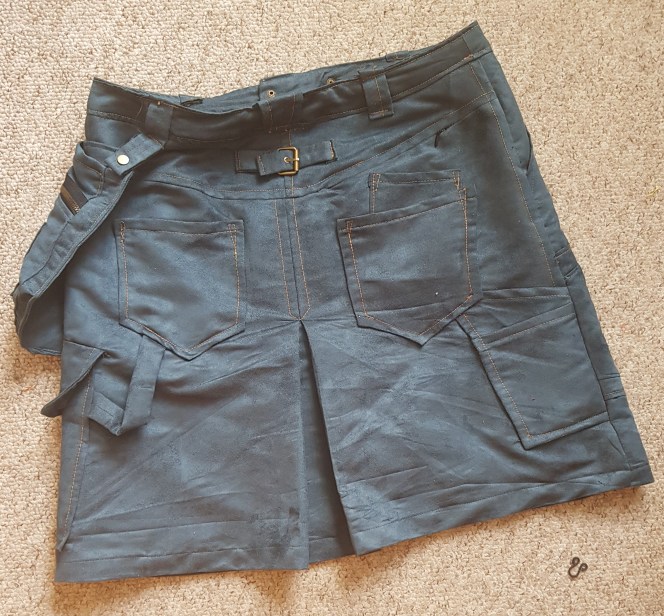
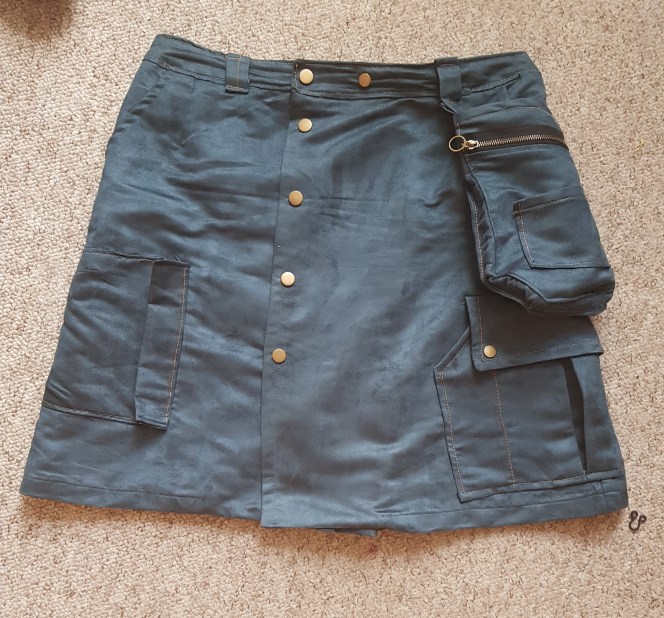
I was really happy when Yuki agreed to let me test her latest pattern, the Anzu cargo skirt. This is a skirt pattern with two main views, One with a ‘double-breasted’ button front and one with a centre zip opening but there is also an enormous range of options that you can mix and match to make a unique, versatile cargo skirt. If I tell you it has pockets that would be the understatement of the year – just counting on the line art I can see 15 pockets on one version and a modest 8 on the other view. It has set-in pockets; it has zip pockets; it has pouch pockets; it has patch pockets; it has pockets in pockets and pockets on pockets and it even has a detachable pocket and two secret pockets. It’s just a pocket extravaganza.
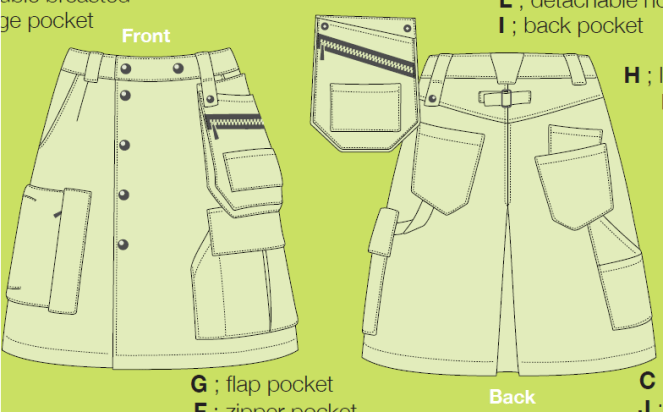
Of course, you don’t have to use all of the pockets, you can switch them up them or you can just use one or two, whichever suits you but I’m just so impressed with all the options that there are in this one pattern. I’m going ‘More is More’ on this project so I’m using all the pockets.
The Anzu cargo skirt pattern contains loads of great features that have been included to improve the efficiency of your sewing I particularly like the staggered hems which allow you to reduce bulk when you sew and turn up your hem allowances. The instructions are clear and of course well illustrated.
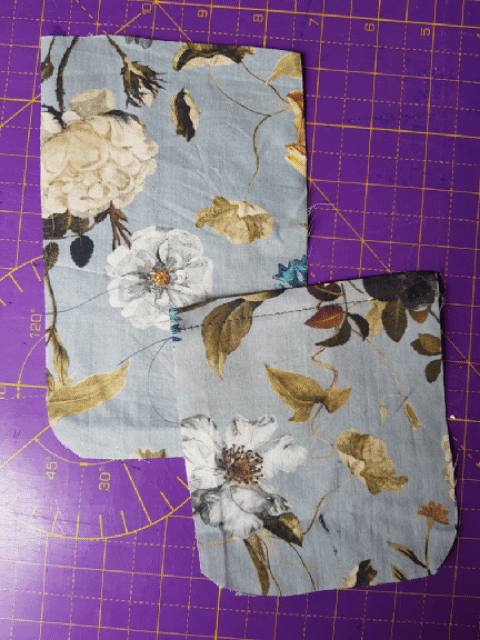
With all these options It was really important to cut out all pieces carefully and mark them clearly in order to know where to position all of the additional pieces. I used Burda tracing paper to mark all the positions of my pockets and the Frixion pen for any other markings that I needed.


If you’re like me and you enjoy the technical elements of sewing you really will relish tackling these pockets as there are so many techniques involved, including zippers – both exposed and concealed, pleated pockets and overlaid pockets with topstitching. There are so many attachments that I really loved all the different methods that I was able to practice in this project.
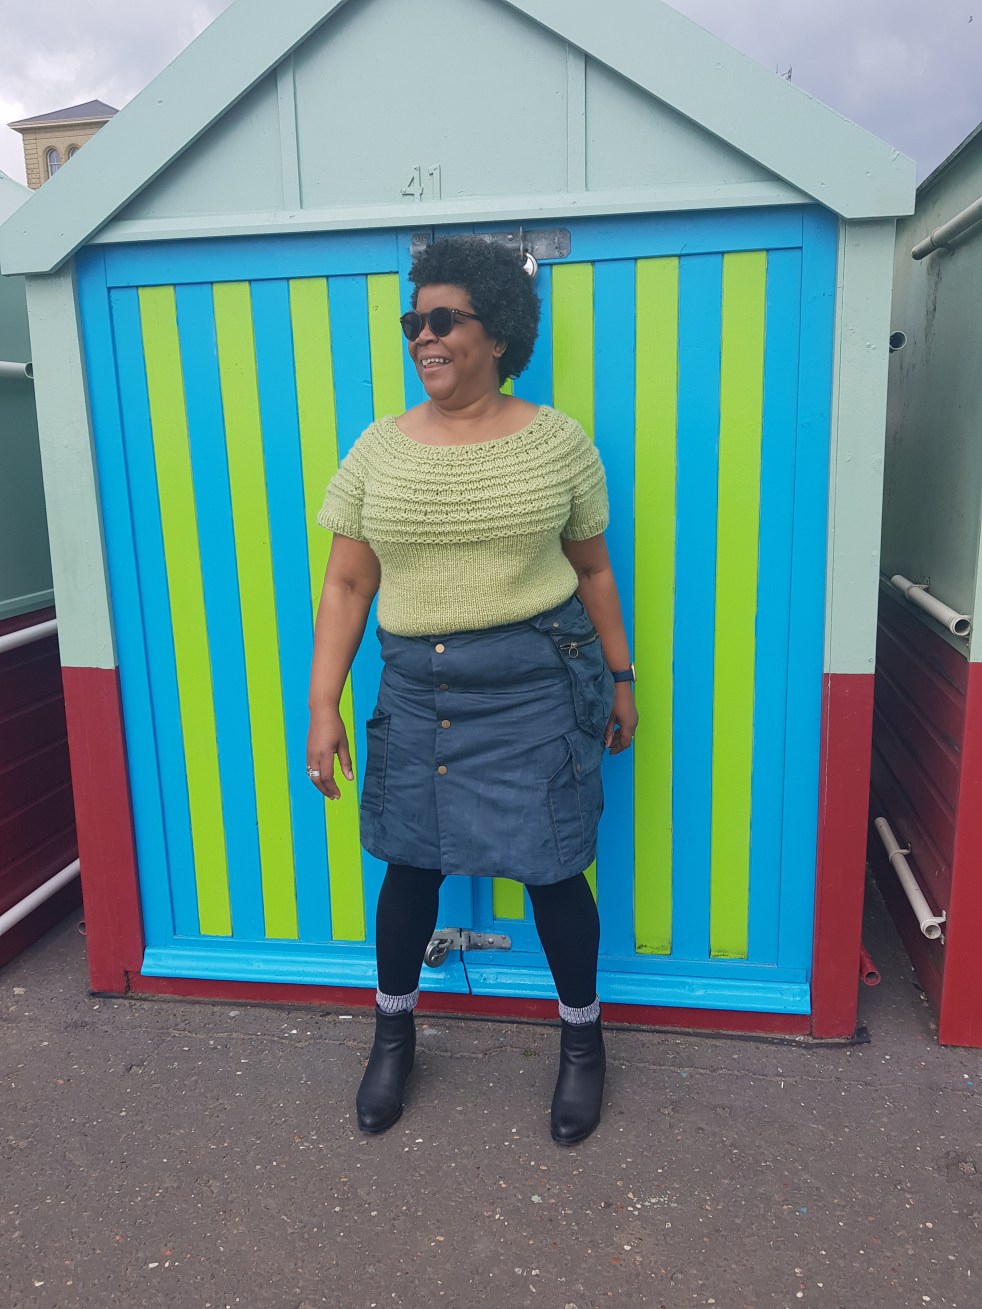
The fabric that I’m using is coming out of the stash. I have a small roll of teal green faux suede fabric which I got a few years ago from Wouters. I think that this will be ideal for the sturdy look of utilitarian cargo skirt but with a hint of Luxe from the suede finish.

Mirrored pattern pieces are something of a pet hate for me. I am always in danger of transposing things and thus it was when cutting out my pocket bags. I had already had to piece my lining together as I barely had enough for so many pockets but then I decided I couldn’t do left and right and kept cutting out the wrong pieces. So this gave me a little headache. But making these internal pockets happen was a joy!
This is quite an intricate make, there are 36 pattern pieces and if you are going to use all of the pockets, this means a lot of steps. Sewing a lot of simple knit garments has made me impatient and I really had to tell myself to take it slow and steady. I usually like to break my makes down and do batches of sewing e.g. all the overlocking, all the long seams, all the zips but as I was testing this pattern I tried to keep to the instructions and follow the construction sequence as given.
The holster pocket construction blows the mind, it is so inspired. Clever engineering creates a sturdy multifunctional detachable pocket. Actually this pocket is more of a small bag. Oh gosh, it is so beautiful and makes me really in awe of designers who can translate their ideas into a brilliantly put together constructions.
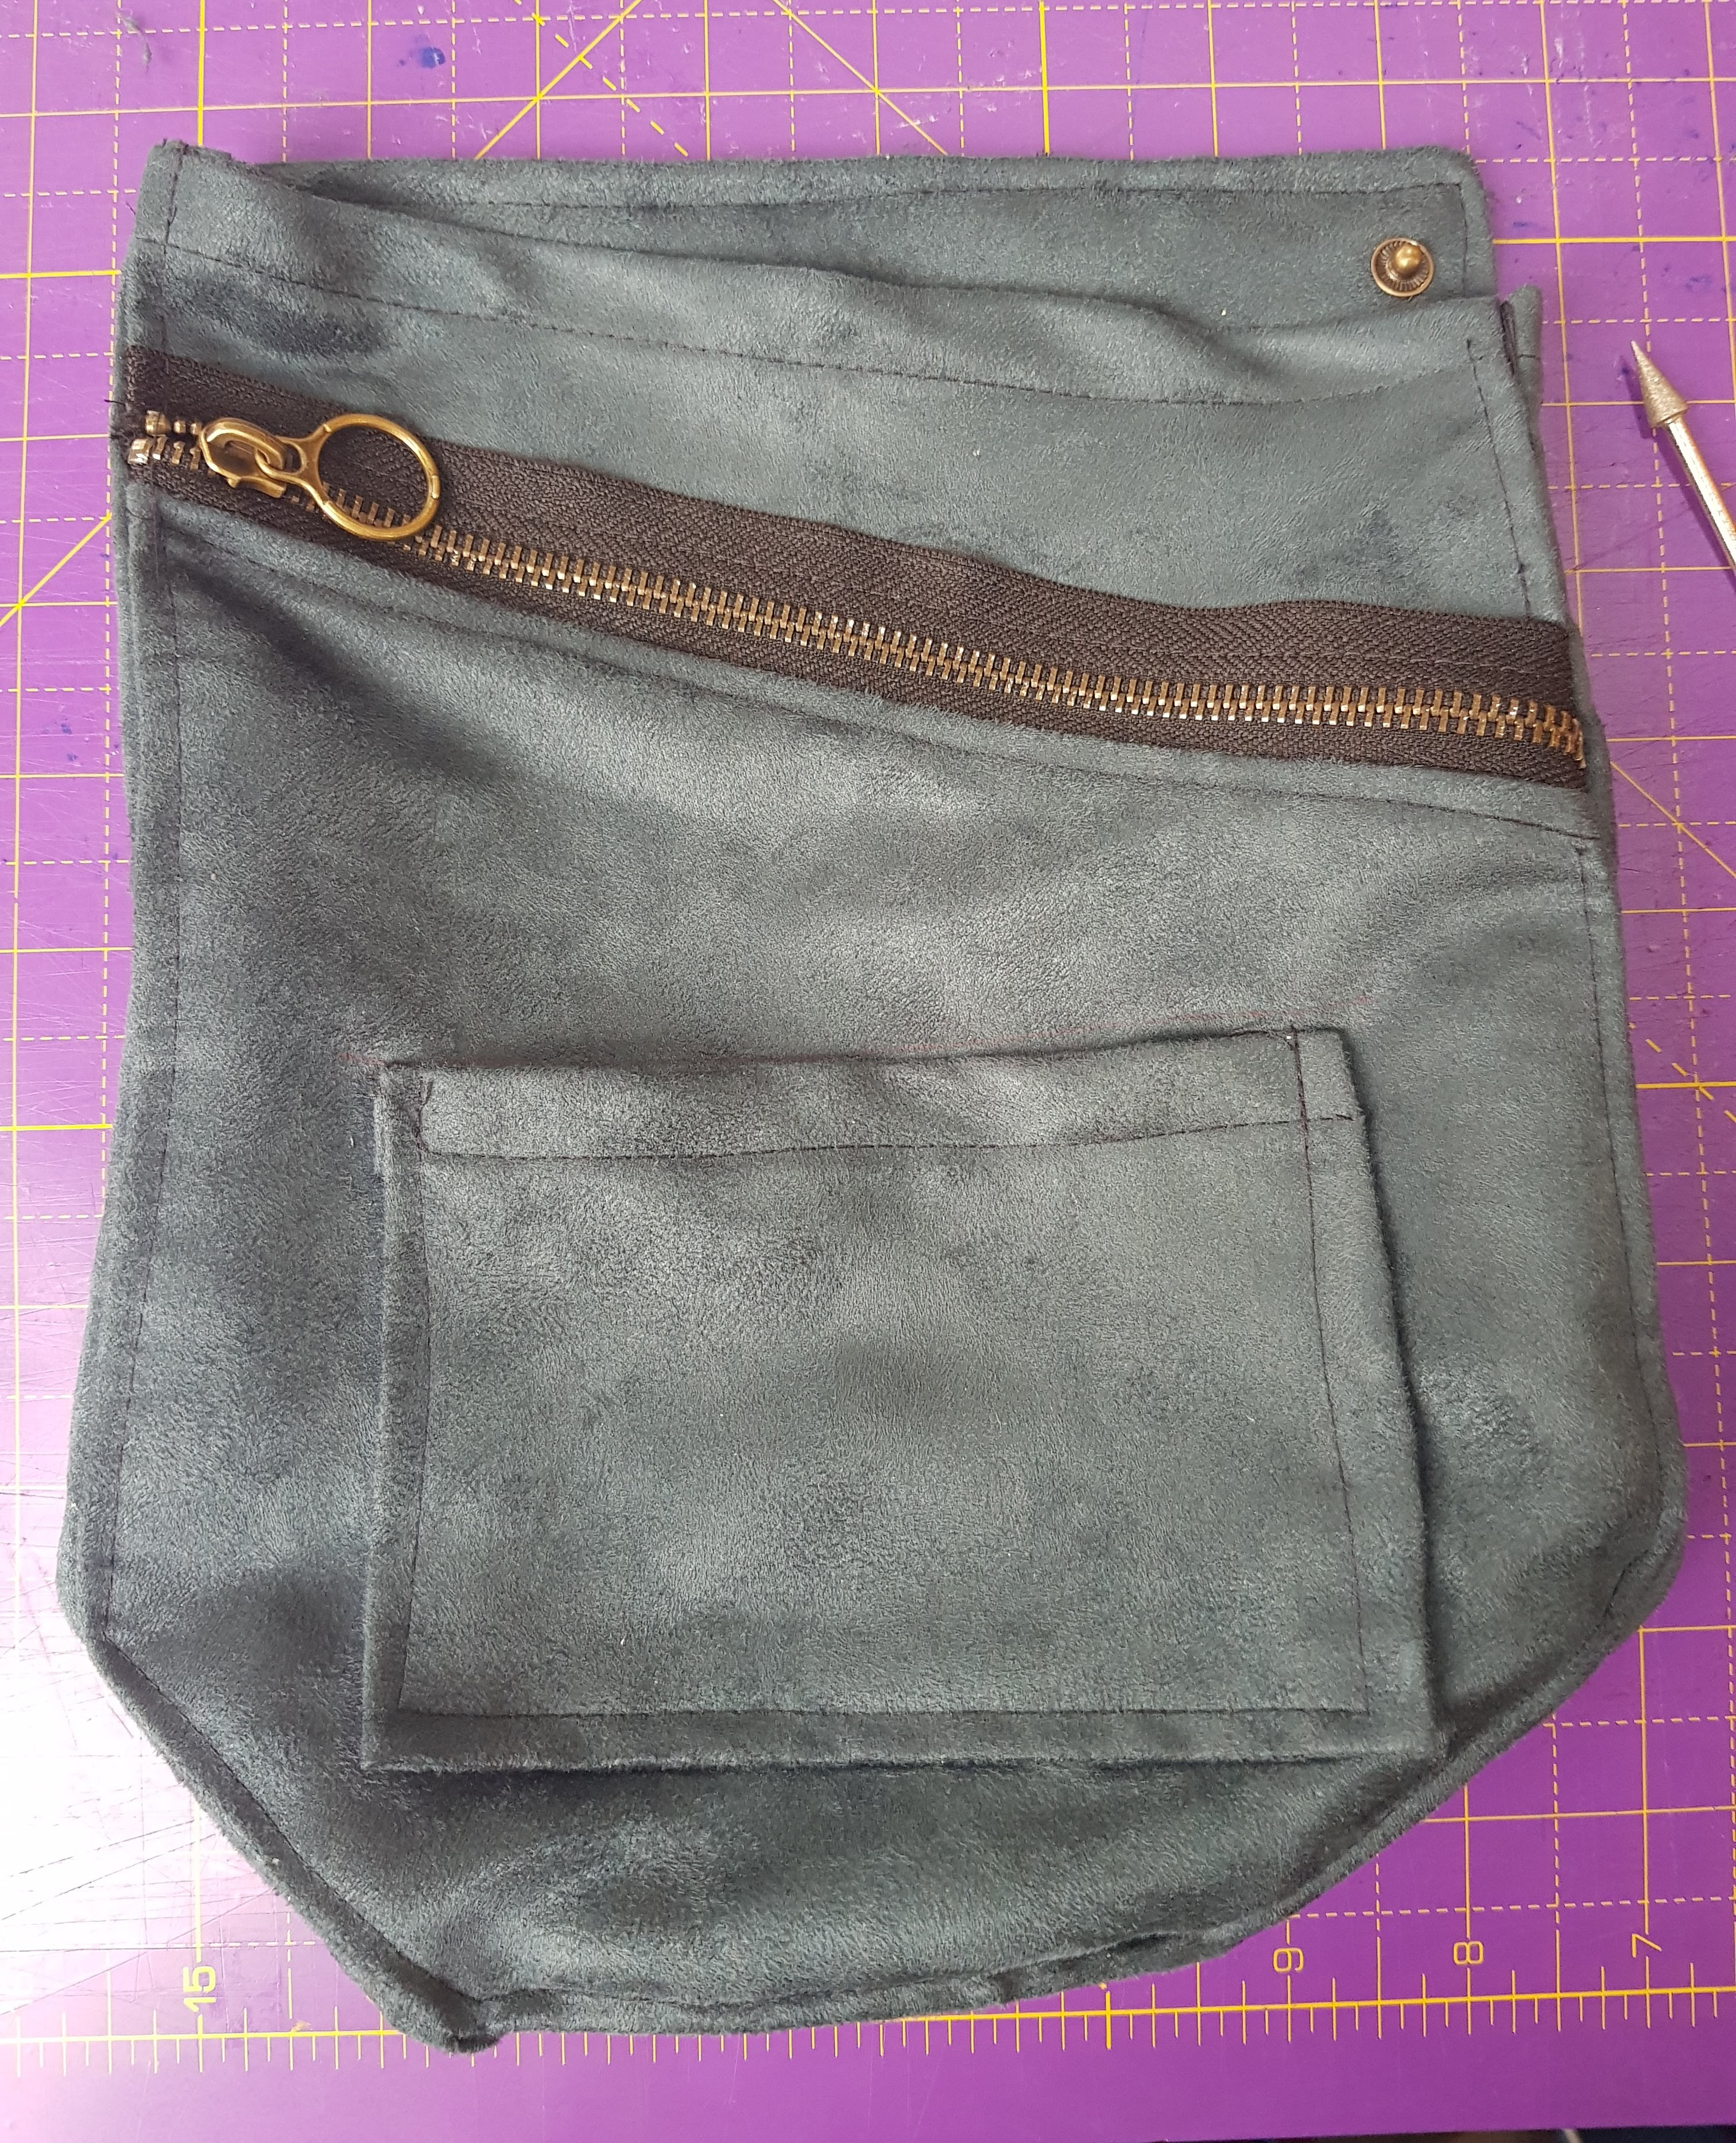
Next I moved to the side zipper pocket. Another stage where multiple skills were in play. Making two pleats was followed by inserting another zip and topstitching in place on the front making sure not to catch the edge pockets I made earlier.
There is a lot of top stitching involved in making this skirt which I enjoy. This one of those things if you get into the groove it’s very mindful and almost meditative. I need to practice a lot more though as mine was a bit wonky in places. If you’ve made jeans (and enjoyed it) you will appreciate this stage.
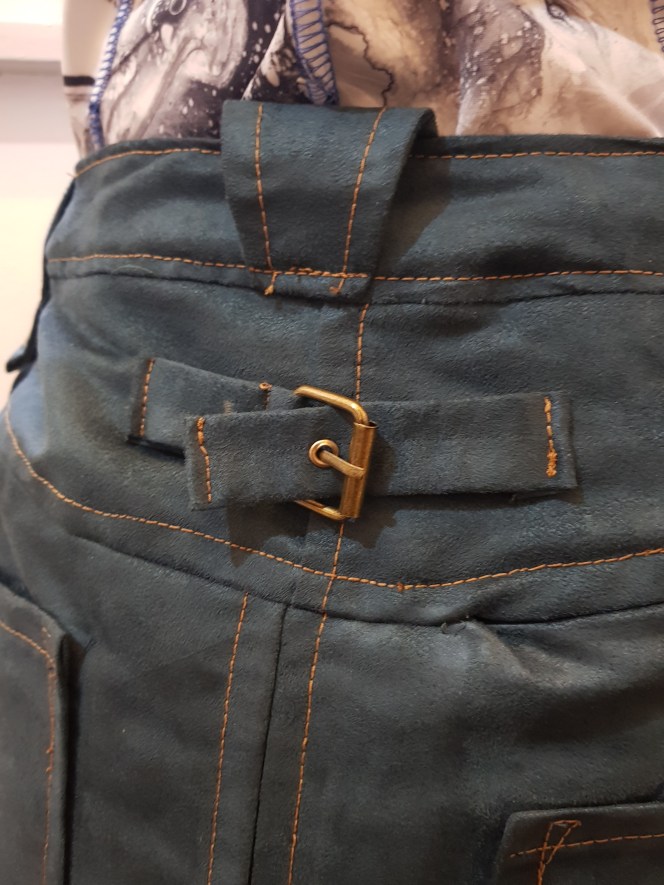
Once all the pockets were sorted the next technical challenge was the closures. I decided to use poppers because I didn’t want to sew buttonholes. I’ll admit it. I liked the idea of some antique brass looking popper and so got a kit and I was able to apply them with a combination of the included tools and my Prym Love pliers set. I had to move into the garden for this phase!

There were a few casualties before I got everything working well but I’m really glad that I used those. I think they complement the suede fabric and are absolutely the vibe I was going for with this skirt.
The finished skirt makes me so happy as it’s a triumph of techniques. There is so much in this skirt that I wanted to share that I wish I could make a sewalong style video to do it justice. I have to confess I made a booboo with the fit. I based it on my most recent measurements from the beginning of the year and I have clearly gained some Lockdown III weight in the interim. Note to self – measure before every project.
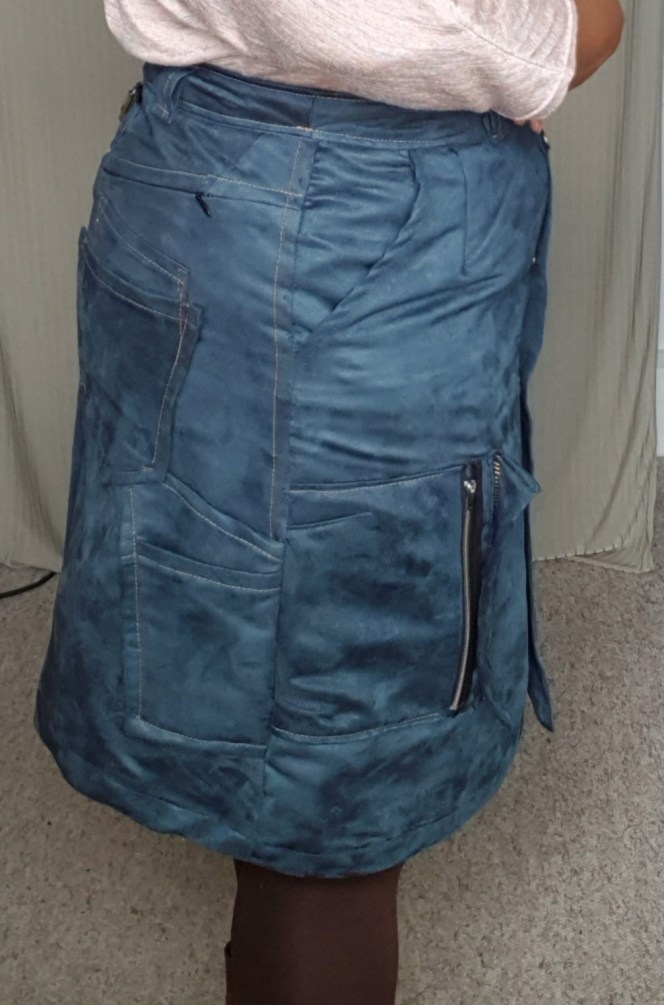


However, joy is not diminished, it’s technically a work skirt with all the tool holding possibilities and I think it would make an excellent dressmaking skirt for me to help curb my habit of leaving everything all over the place. I have even worn it to the allotment a couple of times but it’s just a really nice skirt. I love it and I will be making the other view pretty soon.
Do you love the technical side of sewing?
Thanks for dropping by…


What an awesome pattern! Thanks for the review
LikeLiked by 1 person
Oh, thank you Catherine. I really enjoyed making it.
LikeLike
I love your review! I was nervous about trying such a complex design and spending so much money on a designer I’m not familiar with. I appreciate all your notes and tips and pictures in this post.
LikeLiked by 1 person
Hi Jill, Thank you so much for visiting. I’m glad this post helped a bit. If you share your work anywhere, do tag me.
LikeLike