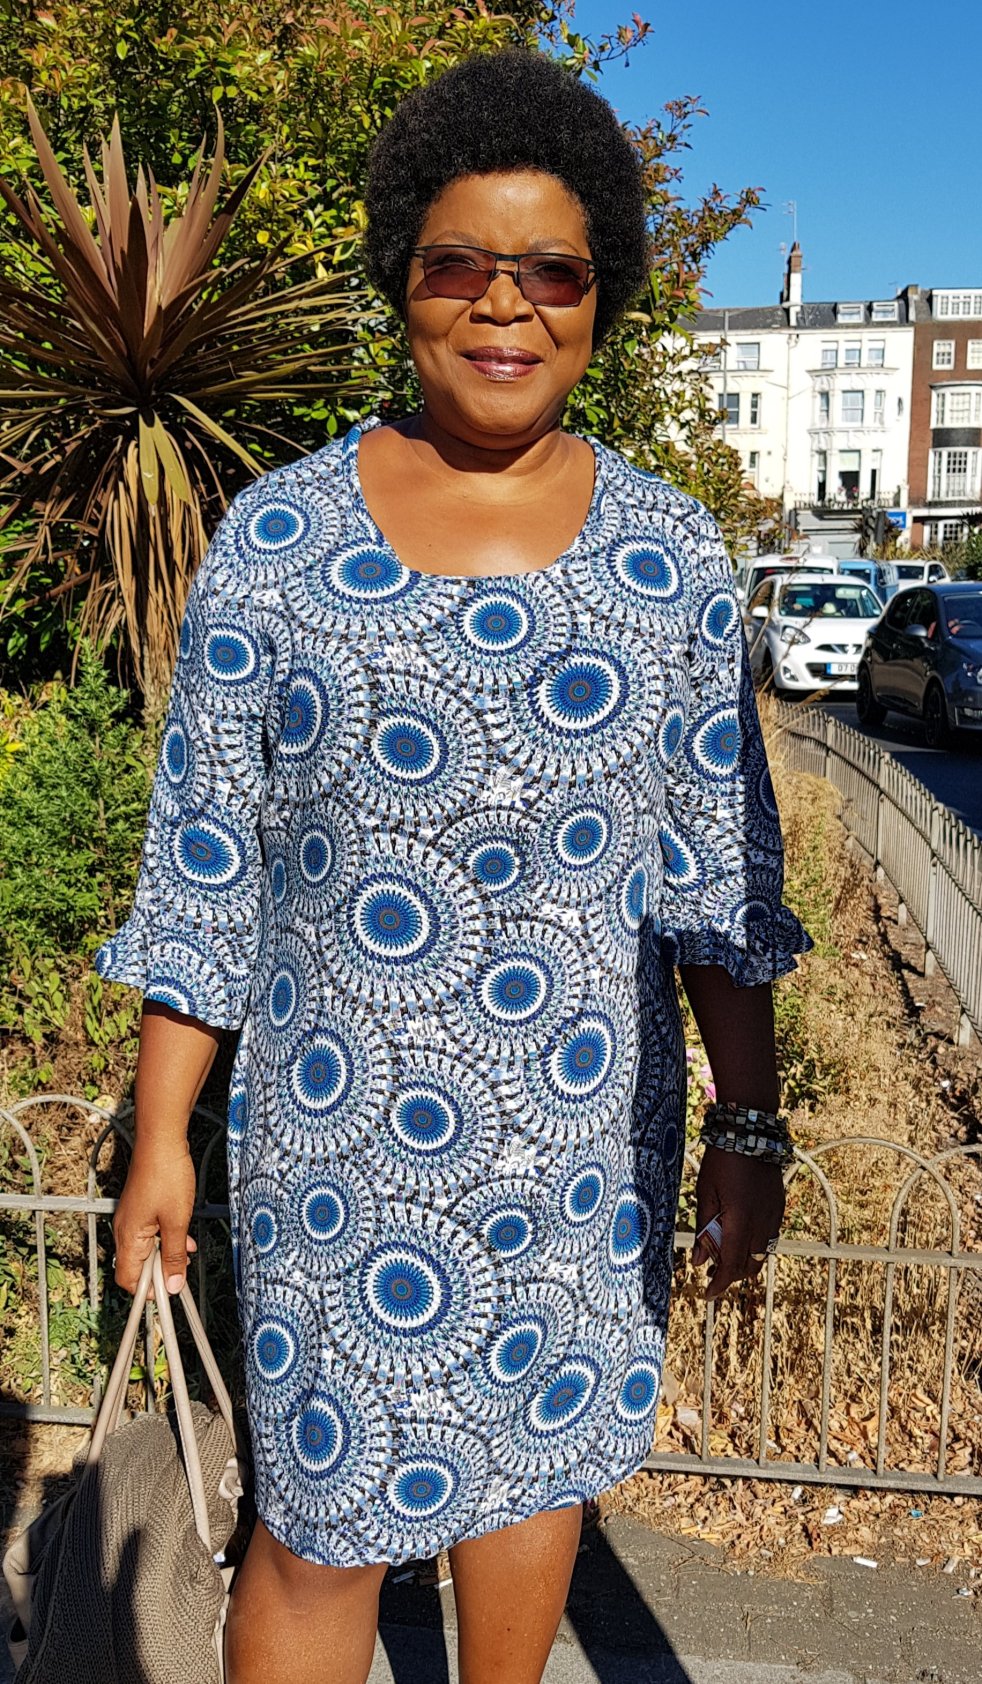
I finally made something using my gift from last years #sewtogetherforsummer challenge. I’m playing it safe but I have made a dress using my Tunic Bible, which was given to me by Sarah, Suzy and Monika last year.

I’ve enjoyed reading the book through a couple of times last year when I won it and looking at what all those uber bloggers had made was really inspiring, but I had not decided on what my first tunic should be. I really like the border print maxi on the bottom row of the cover, but I haven’t found a fabric worthy of it yet. Also, my usual indecision when faced with many choices meant that I was overthinking which version to make. I decided to start simple and make the scoop neck version of the tunic, which I loved in the book.

Once I had decided which tunic to make, using the book was very easy. It has a section on sizing and sections on each element of tunic that they include such as necklines, sleeves, and different placket styles. Using the book, select your size based on your measurements and then trace the pattern from the package in the rear of the book. Then proceed as normal.
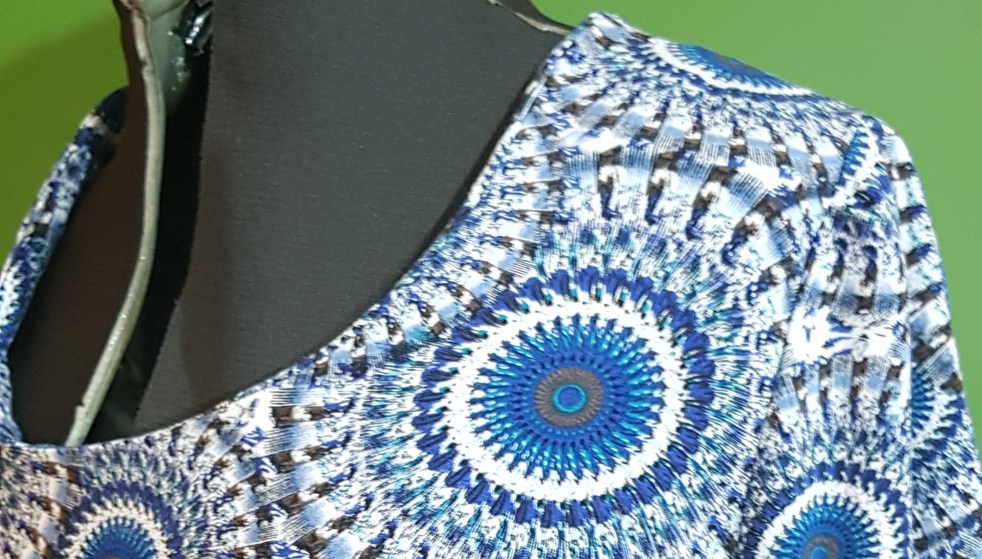
I bought this beautiful woven material last year from eBay, no less, and I decided I could not let another summer come to an end without making it up and wearing it. I thought it would be ideal for this garment. The print is pretty bold so the simplicity of this tunic is a perfect balance.

Making this dress coincided with the fact that I bought myself a coverstitch machine recently and I put it to work doing the finishing. the fabric is viscose, woven and frays readily so I decided to use the CS to finish the hems and seams and while a still have a bit to learn about coverstitching, I’m very pleased with how they turned out, they look so professional.


I’m not really a girly-girl so frills don’t fall under my radar too often, but for a change, I’m feeling that vibe, so I have some slightly frilled sleeves. These were done using a strip of fabric 5cm in width and 1.5 x the circumference of my sleeve. I gathered it by running two rows of stitches on a low tension and pulling the threads until the frill fit the sleeve. I contemplated the same depth of frill on the hem but decided this was enough.

I made up the as instructed but added a self-faced neck and left out the darts in the back as I wanted a really loose fit, we were in the height of our heatwave when I was making this, so loose and flowy was all I could think about.
It’s definitely a favourite already as I’ve worn it three times in one week – and that’s unheard of for me!
Now I need to start plotting a ‘proper’ tunic with one of the variety of placket styles offered in the book. Anyone else out there using their Tunic Bible? I’d love to see them.
Elaine x

That fabric looks great! Hope you feel motivated to sew even more from the book!
LikeLiked by 1 person